Clay & Ceramic Pottery Supply
- \WP_Post::__set_state(array( 'ID' => 978, 'post_author' => '3', 'post_date' => '2024-12-03 15:48:20', 'post_date_gmt' => '2022-12-21 20:30:51', 'post_content' => ' ', 'post_title' => '', 'post_excerpt' => '', 'post_status' => 'publish', 'comment_status' => 'closed', 'ping_status' => 'closed', 'post_password' => '', 'post_name' => '978', 'to_ping' => '', 'pinged' => '', 'post_modified' => '2024-12-03 15:48:20', 'post_modified_gmt' => '2024-12-03 20:48:20', 'post_content_filtered' => '', 'post_parent' => 0, 'guid' => 'http://clay-king.local/?p=978', 'menu_order' => 1, 'post_type' => 'nav_menu_item', 'post_mime_type' => '', 'comment_count' => '0', 'filter' => 'raw', 'db_id' => 978, 'menu_item_parent' => '0', 'object_id' => '23', 'object' => 'product_cat', 'type' => 'taxonomy', 'type_label' => 'Category', 'url' => 'https://www.clay-king.com/product-category/clay/', 'title' => 'Clay', 'target' => '', 'attr_title' => '', 'description' => '', 'classes' => array ( 0 => '', ), 'xfn' => '', 'submenu_items' => array ( ), 'current_page' => false, )) Clay
- \WP_Post::__set_state(array( 'ID' => 955, 'post_author' => '3', 'post_date' => '2024-12-03 15:48:20', 'post_date_gmt' => '2022-12-21 20:26:38', 'post_content' => ' ', 'post_title' => '', 'post_excerpt' => '', 'post_status' => 'publish', 'comment_status' => 'closed', 'ping_status' => 'closed', 'post_password' => '', 'post_name' => '955', 'to_ping' => '', 'pinged' => '', 'post_modified' => '2024-12-03 15:48:20', 'post_modified_gmt' => '2024-12-03 20:48:20', 'post_content_filtered' => '', 'post_parent' => 0, 'guid' => 'http://clay-king.local/?p=955', 'menu_order' => 2, 'post_type' => 'nav_menu_item', 'post_mime_type' => '', 'comment_count' => '0', 'filter' => 'raw', 'db_id' => 955, 'menu_item_parent' => '0', 'object_id' => '28', 'object' => 'product_cat', 'type' => 'taxonomy', 'type_label' => 'Category', 'url' => 'https://www.clay-king.com/product-category/glazes/', 'title' => 'Glazes', 'target' => '', 'attr_title' => '', 'description' => '', 'classes' => array ( 0 => '', ), 'xfn' => '', 'submenu_items' => array ( 0 => \WP_Post::__set_state(array( 'ID' => 40525, 'post_author' => '3', 'post_date' => '2024-12-03 15:48:20', 'post_date_gmt' => '2024-08-13 15:34:02', 'post_content' => ' ', 'post_title' => '', 'post_excerpt' => '', 'post_status' => 'publish', 'comment_status' => 'closed', 'ping_status' => 'closed', 'post_password' => '', 'post_name' => '40525', 'to_ping' => '', 'pinged' => '', 'post_modified' => '2024-12-03 15:48:20', 'post_modified_gmt' => '2024-12-03 20:48:20', 'post_content_filtered' => '', 'post_parent' => 28, 'guid' => 'https://clay-king.local/?p=40525', 'menu_order' => 3, 'post_type' => 'nav_menu_item', 'post_mime_type' => '', 'comment_count' => '0', 'filter' => 'raw', 'db_id' => 40525, 'menu_item_parent' => '955', 'object_id' => '473', 'object' => 'product_cat', 'type' => 'taxonomy', 'type_label' => 'Category', 'url' => 'https://www.clay-king.com/product-category/glazes/no-fire/', 'title' => 'No Fire', 'target' => '', 'attr_title' => '', 'description' => '', 'classes' => array ( 0 => '', ), 'xfn' => '', 'submenu_items' => array ( ), 'current_page' => false, )), 1 => \WP_Post::__set_state(array( 'ID' => 46393, 'post_author' => '3', 'post_date' => '2024-12-03 15:48:20', 'post_date_gmt' => '2024-12-02 23:04:59', 'post_content' => ' ', 'post_title' => '', 'post_excerpt' => '', 'post_status' => 'publish', 'comment_status' => 'closed', 'ping_status' => 'closed', 'post_password' => '', 'post_name' => '46393', 'to_ping' => '', 'pinged' => '', 'post_modified' => '2024-12-03 15:48:20', 'post_modified_gmt' => '2024-12-03 20:48:20', 'post_content_filtered' => '', 'post_parent' => 28, 'guid' => 'https://www.clay-king.com/?p=46393', 'menu_order' => 4, 'post_type' => 'nav_menu_item', 'post_mime_type' => '', 'comment_count' => '0', 'filter' => 'raw', 'db_id' => 46393, 'menu_item_parent' => '955', 'object_id' => '821', 'object' => 'product_cat', 'type' => 'taxonomy', 'type_label' => 'Category', 'url' => 'https://www.clay-king.com/product-category/glazes/low-fire/', 'title' => 'Low Fire', 'target' => '', 'attr_title' => '', 'description' => '', 'classes' => array ( 0 => '', ), 'xfn' => '', 'submenu_items' => array ( ), 'current_page' => false, )), 2 => \WP_Post::__set_state(array( 'ID' => 46392, 'post_author' => '3', 'post_date' => '2024-12-03 15:48:20', 'post_date_gmt' => '2024-12-02 23:04:59', 'post_content' => ' ', 'post_title' => '', 'post_excerpt' => '', 'post_status' => 'publish', 'comment_status' => 'closed', 'ping_status' => 'closed', 'post_password' => '', 'post_name' => '46392', 'to_ping' => '', 'pinged' => '', 'post_modified' => '2024-12-03 15:48:20', 'post_modified_gmt' => '2024-12-03 20:48:20', 'post_content_filtered' => '', 'post_parent' => 28, 'guid' => 'https://www.clay-king.com/?p=46392', 'menu_order' => 5, 'post_type' => 'nav_menu_item', 'post_mime_type' => '', 'comment_count' => '0', 'filter' => 'raw', 'db_id' => 46392, 'menu_item_parent' => '955', 'object_id' => '820', 'object' => 'product_cat', 'type' => 'taxonomy', 'type_label' => 'Category', 'url' => 'https://www.clay-king.com/product-category/glazes/mid-range/', 'title' => 'Mid Range', 'target' => '', 'attr_title' => '', 'description' => '', 'classes' => array ( 0 => '', ), 'xfn' => '', 'submenu_items' => array ( ), 'current_page' => false, )), 3 => \WP_Post::__set_state(array( 'ID' => 46394, 'post_author' => '3', 'post_date' => '2024-12-03 15:48:20', 'post_date_gmt' => '2024-12-02 23:04:59', 'post_content' => ' ', 'post_title' => '', 'post_excerpt' => '', 'post_status' => 'publish', 'comment_status' => 'closed', 'ping_status' => 'closed', 'post_password' => '', 'post_name' => '46394', 'to_ping' => '', 'pinged' => '', 'post_modified' => '2024-12-03 15:48:20', 'post_modified_gmt' => '2024-12-03 20:48:20', 'post_content_filtered' => '', 'post_parent' => 28, 'guid' => 'https://www.clay-king.com/?p=46394', 'menu_order' => 6, 'post_type' => 'nav_menu_item', 'post_mime_type' => '', 'comment_count' => '0', 'filter' => 'raw', 'db_id' => 46394, 'menu_item_parent' => '955', 'object_id' => '823', 'object' => 'product_cat', 'type' => 'taxonomy', 'type_label' => 'Category', 'url' => 'https://www.clay-king.com/product-category/glazes/high-fire/', 'title' => 'High Fire', 'target' => '', 'attr_title' => '', 'description' => '', 'classes' => array ( 0 => '', ), 'xfn' => '', 'submenu_items' => array ( ), 'current_page' => false, )), 4 => \WP_Post::__set_state(array( 'ID' => 46395, 'post_author' => '3', 'post_date' => '2024-12-03 15:48:20', 'post_date_gmt' => '2024-12-02 23:04:59', 'post_content' => ' ', 'post_title' => '', 'post_excerpt' => '', 'post_status' => 'publish', 'comment_status' => 'closed', 'ping_status' => 'closed', 'post_password' => '', 'post_name' => '46395', 'to_ping' => '', 'pinged' => '', 'post_modified' => '2024-12-03 15:48:20', 'post_modified_gmt' => '2024-12-03 20:48:20', 'post_content_filtered' => '', 'post_parent' => 28, 'guid' => 'https://www.clay-king.com/?p=46395', 'menu_order' => 7, 'post_type' => 'nav_menu_item', 'post_mime_type' => '', 'comment_count' => '0', 'filter' => 'raw', 'db_id' => 46395, 'menu_item_parent' => '955', 'object_id' => '825', 'object' => 'product_cat', 'type' => 'taxonomy', 'type_label' => 'Category', 'url' => 'https://www.clay-king.com/product-category/glazes/raku/', 'title' => 'Raku', 'target' => '', 'attr_title' => '', 'description' => '', 'classes' => array ( 0 => '', ), 'xfn' => '', 'submenu_items' => array ( ), 'current_page' => false, )), 5 => \WP_Post::__set_state(array( 'ID' => 46396, 'post_author' => '3', 'post_date' => '2024-12-03 15:48:20', 'post_date_gmt' => '2024-12-02 23:04:59', 'post_content' => ' ', 'post_title' => '', 'post_excerpt' => '', 'post_status' => 'publish', 'comment_status' => 'closed', 'ping_status' => 'closed', 'post_password' => '', 'post_name' => '46396', 'to_ping' => '', 'pinged' => '', 'post_modified' => '2024-12-03 15:48:20', 'post_modified_gmt' => '2024-12-03 20:48:20', 'post_content_filtered' => '', 'post_parent' => 28, 'guid' => 'https://www.clay-king.com/?p=46396', 'menu_order' => 8, 'post_type' => 'nav_menu_item', 'post_mime_type' => '', 'comment_count' => '0', 'filter' => 'raw', 'db_id' => 46396, 'menu_item_parent' => '955', 'object_id' => '826', 'object' => 'product_cat', 'type' => 'taxonomy', 'type_label' => 'Category', 'url' => 'https://www.clay-king.com/product-category/glazes/stains/', 'title' => 'Stains', 'target' => '', 'attr_title' => '', 'description' => '', 'classes' => array ( 0 => '', ), 'xfn' => '', 'submenu_items' => array ( ), 'current_page' => false, )), 6 => \WP_Post::__set_state(array( 'ID' => 46397, 'post_author' => '3', 'post_date' => '2024-12-03 15:48:20', 'post_date_gmt' => '2024-12-02 23:04:59', 'post_content' => ' ', 'post_title' => '', 'post_excerpt' => '', 'post_status' => 'publish', 'comment_status' => 'closed', 'ping_status' => 'closed', 'post_password' => '', 'post_name' => '46397', 'to_ping' => '', 'pinged' => '', 'post_modified' => '2024-12-03 15:48:20', 'post_modified_gmt' => '2024-12-03 20:48:20', 'post_content_filtered' => '', 'post_parent' => 28, 'guid' => 'https://www.clay-king.com/?p=46397', 'menu_order' => 9, 'post_type' => 'nav_menu_item', 'post_mime_type' => '', 'comment_count' => '0', 'filter' => 'raw', 'db_id' => 46397, 'menu_item_parent' => '955', 'object_id' => '822', 'object' => 'product_cat', 'type' => 'taxonomy', 'type_label' => 'Category', 'url' => 'https://www.clay-king.com/product-category/glazes/underglaze/', 'title' => 'Underglaze', 'target' => '', 'attr_title' => '', 'description' => '', 'classes' => array ( 0 => '', ), 'xfn' => '', 'submenu_items' => array ( ), 'current_page' => false, )), 7 => \WP_Post::__set_state(array( 'ID' => 46358, 'post_author' => '3', 'post_date' => '2024-12-03 15:48:20', 'post_date_gmt' => '2024-12-02 21:05:20', 'post_content' => ' ', 'post_title' => '', 'post_excerpt' => '', 'post_status' => 'publish', 'comment_status' => 'closed', 'ping_status' => 'closed', 'post_password' => '', 'post_name' => '46358', 'to_ping' => '', 'pinged' => '', 'post_modified' => '2024-12-03 15:48:20', 'post_modified_gmt' => '2024-12-03 20:48:20', 'post_content_filtered' => '', 'post_parent' => 28, 'guid' => 'https://www.clay-king.com/?p=46358', 'menu_order' => 10, 'post_type' => 'nav_menu_item', 'post_mime_type' => '', 'comment_count' => '0', 'filter' => 'raw', 'db_id' => 46358, 'menu_item_parent' => '955', 'object_id' => '767', 'object' => 'product_cat', 'type' => 'taxonomy', 'type_label' => 'Category', 'url' => 'https://www.clay-king.com/product-category/glazes/underglaze-transfers/', 'title' => 'Underglaze Transfers', 'target' => '', 'attr_title' => '', 'description' => '', 'classes' => array ( 0 => '', ), 'xfn' => '', 'submenu_items' => array ( ), 'current_page' => false, )), 8 => \WP_Post::__set_state(array( 'ID' => 46398, 'post_author' => '3', 'post_date' => '2024-12-03 15:48:20', 'post_date_gmt' => '2024-12-02 23:04:59', 'post_content' => ' ', 'post_title' => '', 'post_excerpt' => '', 'post_status' => 'publish', 'comment_status' => 'closed', 'ping_status' => 'closed', 'post_password' => '', 'post_name' => '46398', 'to_ping' => '', 'pinged' => '', 'post_modified' => '2024-12-03 15:48:20', 'post_modified_gmt' => '2024-12-03 20:48:20', 'post_content_filtered' => '', 'post_parent' => 28, 'guid' => 'https://www.clay-king.com/?p=46398', 'menu_order' => 11, 'post_type' => 'nav_menu_item', 'post_mime_type' => '', 'comment_count' => '0', 'filter' => 'raw', 'db_id' => 46398, 'menu_item_parent' => '955', 'object_id' => '824', 'object' => 'product_cat', 'type' => 'taxonomy', 'type_label' => 'Category', 'url' => 'https://www.clay-king.com/product-category/glazes/washes/', 'title' => 'Washes', 'target' => '', 'attr_title' => '', 'description' => '', 'classes' => array ( 0 => '', ), 'xfn' => '', 'submenu_items' => array ( ), 'current_page' => false, )), ), 'current_page' => false, )) Glazes
- \WP_Post::__set_state(array( 'ID' => 956, 'post_author' => '3', 'post_date' => '2024-12-03 15:48:20', 'post_date_gmt' => '2022-12-21 20:29:28', 'post_content' => ' ', 'post_title' => '', 'post_excerpt' => '', 'post_status' => 'publish', 'comment_status' => 'closed', 'ping_status' => 'closed', 'post_password' => '', 'post_name' => '956', 'to_ping' => '', 'pinged' => '', 'post_modified' => '2024-12-03 15:48:20', 'post_modified_gmt' => '2024-12-03 20:48:20', 'post_content_filtered' => '', 'post_parent' => 0, 'guid' => 'http://clay-king.local/?p=956', 'menu_order' => 12, 'post_type' => 'nav_menu_item', 'post_mime_type' => '', 'comment_count' => '0', 'filter' => 'raw', 'db_id' => 956, 'menu_item_parent' => '0', 'object_id' => '27', 'object' => 'product_cat', 'type' => 'taxonomy', 'type_label' => 'Category', 'url' => 'https://www.clay-king.com/product-category/pottery-tools/', 'title' => 'Pottery Tools', 'target' => '', 'attr_title' => '', 'description' => '', 'classes' => array ( 0 => '', ), 'xfn' => '', 'submenu_items' => array ( 0 => \WP_Post::__set_state(array( 'ID' => 958, 'post_author' => '3', 'post_date' => '2024-12-03 15:48:20', 'post_date_gmt' => '2022-12-21 20:29:28', 'post_content' => ' ', 'post_title' => '', 'post_excerpt' => '', 'post_status' => 'publish', 'comment_status' => 'closed', 'ping_status' => 'closed', 'post_password' => '', 'post_name' => '958', 'to_ping' => '', 'pinged' => '', 'post_modified' => '2024-12-03 15:48:20', 'post_modified_gmt' => '2024-12-03 20:48:20', 'post_content_filtered' => '', 'post_parent' => 27, 'guid' => 'http://clay-king.local/?p=958', 'menu_order' => 13, 'post_type' => 'nav_menu_item', 'post_mime_type' => '', 'comment_count' => '0', 'filter' => 'raw', 'db_id' => 958, 'menu_item_parent' => '956', 'object_id' => '44', 'object' => 'product_cat', 'type' => 'taxonomy', 'type_label' => 'Category', 'url' => 'https://www.clay-king.com/product-category/pottery-tools/cutting/', 'title' => 'Cutting', 'target' => '', 'attr_title' => '', 'description' => '', 'classes' => array ( 0 => '', ), 'xfn' => '', 'submenu_items' => array ( ), 'current_page' => false, )), 1 => \WP_Post::__set_state(array( 'ID' => 957, 'post_author' => '3', 'post_date' => '2024-12-03 15:48:20', 'post_date_gmt' => '2022-12-21 20:29:28', 'post_content' => ' ', 'post_title' => '', 'post_excerpt' => '', 'post_status' => 'publish', 'comment_status' => 'closed', 'ping_status' => 'closed', 'post_password' => '', 'post_name' => '957', 'to_ping' => '', 'pinged' => '', 'post_modified' => '2024-12-03 15:48:20', 'post_modified_gmt' => '2024-12-03 20:48:20', 'post_content_filtered' => '', 'post_parent' => 27, 'guid' => 'http://clay-king.local/?p=957', 'menu_order' => 14, 'post_type' => 'nav_menu_item', 'post_mime_type' => '', 'comment_count' => '0', 'filter' => 'raw', 'db_id' => 957, 'menu_item_parent' => '956', 'object_id' => '45', 'object' => 'product_cat', 'type' => 'taxonomy', 'type_label' => 'Category', 'url' => 'https://www.clay-king.com/product-category/pottery-tools/carving/', 'title' => 'Trimming & Carving', 'target' => '', 'attr_title' => '', 'description' => '', 'classes' => array ( 0 => '', ), 'xfn' => '', 'submenu_items' => array ( ), 'current_page' => false, )), 2 => \WP_Post::__set_state(array( 'ID' => 961, 'post_author' => '3', 'post_date' => '2024-12-03 15:48:20', 'post_date_gmt' => '2022-12-21 20:29:28', 'post_content' => ' ', 'post_title' => '', 'post_excerpt' => '', 'post_status' => 'publish', 'comment_status' => 'closed', 'ping_status' => 'closed', 'post_password' => '', 'post_name' => '961', 'to_ping' => '', 'pinged' => '', 'post_modified' => '2024-12-03 15:48:20', 'post_modified_gmt' => '2024-12-03 20:48:20', 'post_content_filtered' => '', 'post_parent' => 27, 'guid' => 'http://clay-king.local/?p=961', 'menu_order' => 15, 'post_type' => 'nav_menu_item', 'post_mime_type' => '', 'comment_count' => '0', 'filter' => 'raw', 'db_id' => 961, 'menu_item_parent' => '956', 'object_id' => '47', 'object' => 'product_cat', 'type' => 'taxonomy', 'type_label' => 'Category', 'url' => 'https://www.clay-king.com/product-category/pottery-tools/molds/', 'title' => 'Molds', 'target' => '', 'attr_title' => '', 'description' => '', 'classes' => array ( 0 => '', ), 'xfn' => '', 'submenu_items' => array ( ), 'current_page' => false, )), 3 => \WP_Post::__set_state(array( 'ID' => 967, 'post_author' => '3', 'post_date' => '2024-12-03 15:48:20', 'post_date_gmt' => '2022-12-21 20:29:28', 'post_content' => ' ', 'post_title' => '', 'post_excerpt' => '', 'post_status' => 'publish', 'comment_status' => 'closed', 'ping_status' => 'closed', 'post_password' => '', 'post_name' => '967', 'to_ping' => '', 'pinged' => '', 'post_modified' => '2024-12-03 15:48:20', 'post_modified_gmt' => '2024-12-03 20:48:20', 'post_content_filtered' => '', 'post_parent' => 27, 'guid' => 'http://clay-king.local/?p=967', 'menu_order' => 16, 'post_type' => 'nav_menu_item', 'post_mime_type' => '', 'comment_count' => '0', 'filter' => 'raw', 'db_id' => 967, 'menu_item_parent' => '956', 'object_id' => '48', 'object' => 'product_cat', 'type' => 'taxonomy', 'type_label' => 'Category', 'url' => 'https://www.clay-king.com/product-category/pottery-tools/surface-decoration/textures/', 'title' => 'Textures', 'target' => '', 'attr_title' => '', 'description' => '', 'classes' => array ( 0 => '', ), 'xfn' => '', 'submenu_items' => array ( ), 'current_page' => false, )), 4 => \WP_Post::__set_state(array( 'ID' => 966, 'post_author' => '3', 'post_date' => '2024-12-03 15:48:20', 'post_date_gmt' => '2022-12-21 20:29:28', 'post_content' => ' ', 'post_title' => '', 'post_excerpt' => '', 'post_status' => 'publish', 'comment_status' => 'closed', 'ping_status' => 'closed', 'post_password' => '', 'post_name' => '966', 'to_ping' => '', 'pinged' => '', 'post_modified' => '2024-12-03 15:48:20', 'post_modified_gmt' => '2024-12-03 20:48:20', 'post_content_filtered' => '', 'post_parent' => 27, 'guid' => 'http://clay-king.local/?p=966', 'menu_order' => 17, 'post_type' => 'nav_menu_item', 'post_mime_type' => '', 'comment_count' => '0', 'filter' => 'raw', 'db_id' => 966, 'menu_item_parent' => '956', 'object_id' => '50', 'object' => 'product_cat', 'type' => 'taxonomy', 'type_label' => 'Category', 'url' => 'https://www.clay-king.com/product-category/pottery-tools/surface-decoration/stamps/', 'title' => 'Stamps', 'target' => '', 'attr_title' => '', 'description' => '', 'classes' => array ( 0 => '', ), 'xfn' => '', 'submenu_items' => array ( ), 'current_page' => false, )), 5 => \WP_Post::__set_state(array( 'ID' => 965, 'post_author' => '3', 'post_date' => '2024-12-03 15:48:20', 'post_date_gmt' => '2022-12-21 20:29:28', 'post_content' => ' ', 'post_title' => '', 'post_excerpt' => '', 'post_status' => 'publish', 'comment_status' => 'closed', 'ping_status' => 'closed', 'post_password' => '', 'post_name' => '965', 'to_ping' => '', 'pinged' => '', 'post_modified' => '2024-12-03 15:48:20', 'post_modified_gmt' => '2024-12-03 20:48:20', 'post_content_filtered' => '', 'post_parent' => 27, 'guid' => 'http://clay-king.local/?p=965', 'menu_order' => 18, 'post_type' => 'nav_menu_item', 'post_mime_type' => '', 'comment_count' => '0', 'filter' => 'raw', 'db_id' => 965, 'menu_item_parent' => '956', 'object_id' => '51', 'object' => 'product_cat', 'type' => 'taxonomy', 'type_label' => 'Category', 'url' => 'https://www.clay-king.com/product-category/pottery-tools/surface-decoration/rollers/', 'title' => 'Rollers', 'target' => '', 'attr_title' => '', 'description' => '', 'classes' => array ( 0 => '', ), 'xfn' => '', 'submenu_items' => array ( ), 'current_page' => false, )), 6 => \WP_Post::__set_state(array( 'ID' => 959, 'post_author' => '3', 'post_date' => '2024-12-03 15:48:20', 'post_date_gmt' => '2022-12-21 20:29:28', 'post_content' => ' ', 'post_title' => '', 'post_excerpt' => '', 'post_status' => 'publish', 'comment_status' => 'closed', 'ping_status' => 'closed', 'post_password' => '', 'post_name' => '959', 'to_ping' => '', 'pinged' => '', 'post_modified' => '2024-12-03 15:48:20', 'post_modified_gmt' => '2024-12-03 20:48:20', 'post_content_filtered' => '', 'post_parent' => 27, 'guid' => 'http://clay-king.local/?p=959', 'menu_order' => 19, 'post_type' => 'nav_menu_item', 'post_mime_type' => '', 'comment_count' => '0', 'filter' => 'raw', 'db_id' => 959, 'menu_item_parent' => '956', 'object_id' => '53', 'object' => 'product_cat', 'type' => 'taxonomy', 'type_label' => 'Category', 'url' => 'https://www.clay-king.com/product-category/pottery-tools/finishing-sanding/', 'title' => 'Finishing & Sanding', 'target' => '', 'attr_title' => '', 'description' => '', 'classes' => array ( 0 => '', ), 'xfn' => '', 'submenu_items' => array ( ), 'current_page' => false, )), 7 => \WP_Post::__set_state(array( 'ID' => 962, 'post_author' => '3', 'post_date' => '2024-12-03 15:48:20', 'post_date_gmt' => '2022-12-21 20:29:28', 'post_content' => ' ', 'post_title' => '', 'post_excerpt' => '', 'post_status' => 'publish', 'comment_status' => 'closed', 'ping_status' => 'closed', 'post_password' => '', 'post_name' => '962', 'to_ping' => '', 'pinged' => '', 'post_modified' => '2024-12-03 15:48:20', 'post_modified_gmt' => '2024-12-03 20:48:20', 'post_content_filtered' => '', 'post_parent' => 27, 'guid' => 'http://clay-king.local/?p=962', 'menu_order' => 20, 'post_type' => 'nav_menu_item', 'post_mime_type' => '', 'comment_count' => '0', 'filter' => 'raw', 'db_id' => 962, 'menu_item_parent' => '956', 'object_id' => '55', 'object' => 'product_cat', 'type' => 'taxonomy', 'type_label' => 'Category', 'url' => 'https://www.clay-king.com/product-category/pottery-tools/other-pottery-tools/', 'title' => 'Other', 'target' => '', 'attr_title' => '', 'description' => '', 'classes' => array ( 0 => '', ), 'xfn' => '', 'submenu_items' => array ( ), 'current_page' => false, )), 8 => \WP_Post::__set_state(array( 'ID' => 40520, 'post_author' => '3', 'post_date' => '2024-12-03 15:48:20', 'post_date_gmt' => '2024-08-13 15:34:02', 'post_content' => ' ', 'post_title' => '', 'post_excerpt' => '', 'post_status' => 'publish', 'comment_status' => 'closed', 'ping_status' => 'closed', 'post_password' => '', 'post_name' => '40520', 'to_ping' => '', 'pinged' => '', 'post_modified' => '2024-12-03 15:48:20', 'post_modified_gmt' => '2024-12-03 20:48:20', 'post_content_filtered' => '', 'post_parent' => 26, 'guid' => 'https://clay-king.local/?p=40520', 'menu_order' => 21, 'post_type' => 'nav_menu_item', 'post_mime_type' => '', 'comment_count' => '0', 'filter' => 'raw', 'db_id' => 40520, 'menu_item_parent' => '956', 'object_id' => '488', 'object' => 'product_cat', 'type' => 'taxonomy', 'type_label' => 'Category', 'url' => 'https://www.clay-king.com/product-category/accessories/other-equipment-accessories/', 'title' => 'Other Equipment', 'target' => '', 'attr_title' => '', 'description' => '', 'classes' => array ( 0 => '', ), 'xfn' => '', 'submenu_items' => array ( ), 'current_page' => false, )), ), 'current_page' => false, )) Pottery Tools
- \WP_Post::__set_state(array( 'ID' => 45878, 'post_author' => '3', 'post_date' => '2024-12-03 15:48:20', 'post_date_gmt' => '2024-11-21 19:33:18', 'post_content' => ' ', 'post_title' => '', 'post_excerpt' => '', 'post_status' => 'publish', 'comment_status' => 'closed', 'ping_status' => 'closed', 'post_password' => '', 'post_name' => '45878', 'to_ping' => '', 'pinged' => '', 'post_modified' => '2024-12-03 15:48:20', 'post_modified_gmt' => '2024-12-03 20:48:20', 'post_content_filtered' => '', 'post_parent' => 0, 'guid' => 'https://www.clay-king.com/?p=45878', 'menu_order' => 22, 'post_type' => 'nav_menu_item', 'post_mime_type' => '', 'comment_count' => '0', 'filter' => 'raw', 'db_id' => 45878, 'menu_item_parent' => '0', 'object_id' => '778', 'object' => 'product_cat', 'type' => 'taxonomy', 'type_label' => 'Category', 'url' => 'https://www.clay-king.com/product-category/pottery-tools/wholesale-pottery-tools/', 'title' => 'Wholesale Pottery Tools', 'target' => '', 'attr_title' => '', 'description' => '', 'classes' => array ( 0 => '', ), 'xfn' => '', 'submenu_items' => array ( ), 'current_page' => false, )) Wholesale Pottery Tools
- \WP_Post::__set_state(array( 'ID' => 979, 'post_author' => '3', 'post_date' => '2024-12-03 15:48:20', 'post_date_gmt' => '2022-12-21 20:30:51', 'post_content' => ' ', 'post_title' => '', 'post_excerpt' => '', 'post_status' => 'publish', 'comment_status' => 'closed', 'ping_status' => 'closed', 'post_password' => '', 'post_name' => '979', 'to_ping' => '', 'pinged' => '', 'post_modified' => '2024-12-03 15:48:20', 'post_modified_gmt' => '2024-12-03 20:48:20', 'post_content_filtered' => '', 'post_parent' => 0, 'guid' => 'http://clay-king.local/?p=979', 'menu_order' => 23, 'post_type' => 'nav_menu_item', 'post_mime_type' => '', 'comment_count' => '0', 'filter' => 'raw', 'db_id' => 979, 'menu_item_parent' => '0', 'object_id' => '24', 'object' => 'product_cat', 'type' => 'taxonomy', 'type_label' => 'Category', 'url' => 'https://www.clay-king.com/product-category/kilns/', 'title' => 'Kilns', 'target' => '', 'attr_title' => '', 'description' => '', 'classes' => array ( 0 => '', ), 'xfn' => '', 'submenu_items' => array ( 0 => \WP_Post::__set_state(array( 'ID' => 46466, 'post_author' => '3', 'post_date' => '2024-12-03 15:48:21', 'post_date_gmt' => '2024-12-03 20:48:21', 'post_content' => ' ', 'post_title' => '', 'post_excerpt' => '', 'post_status' => 'publish', 'comment_status' => 'closed', 'ping_status' => 'closed', 'post_password' => '', 'post_name' => '46466', 'to_ping' => '', 'pinged' => '', 'post_modified' => '2024-12-03 15:48:21', 'post_modified_gmt' => '2024-12-03 20:48:21', 'post_content_filtered' => '', 'post_parent' => 24, 'guid' => 'https://www.clay-king.com/?p=46466', 'menu_order' => 24, 'post_type' => 'nav_menu_item', 'post_mime_type' => '', 'comment_count' => '0', 'filter' => 'raw', 'db_id' => 46466, 'menu_item_parent' => '979', 'object_id' => '846', 'object' => 'product_cat', 'type' => 'taxonomy', 'type_label' => 'Category', 'url' => 'https://www.clay-king.com/product-category/kilns/ceramic-kilns/', 'title' => 'Ceramic Kilns', 'target' => '', 'attr_title' => '', 'description' => '', 'classes' => array ( 0 => '', ), 'xfn' => '', 'submenu_items' => array ( ), 'current_page' => false, )), 1 => \WP_Post::__set_state(array( 'ID' => 46467, 'post_author' => '3', 'post_date' => '2024-12-03 15:48:21', 'post_date_gmt' => '2024-12-03 20:48:21', 'post_content' => ' ', 'post_title' => '', 'post_excerpt' => '', 'post_status' => 'publish', 'comment_status' => 'closed', 'ping_status' => 'closed', 'post_password' => '', 'post_name' => '46467', 'to_ping' => '', 'pinged' => '', 'post_modified' => '2024-12-03 15:48:21', 'post_modified_gmt' => '2024-12-03 20:48:21', 'post_content_filtered' => '', 'post_parent' => 24, 'guid' => 'https://www.clay-king.com/?p=46467', 'menu_order' => 25, 'post_type' => 'nav_menu_item', 'post_mime_type' => '', 'comment_count' => '0', 'filter' => 'raw', 'db_id' => 46467, 'menu_item_parent' => '979', 'object_id' => '852', 'object' => 'product_cat', 'type' => 'taxonomy', 'type_label' => 'Category', 'url' => 'https://www.clay-king.com/product-category/kilns/glass-kilns/', 'title' => 'Glass Kilns', 'target' => '', 'attr_title' => '', 'description' => '', 'classes' => array ( 0 => '', ), 'xfn' => '', 'submenu_items' => array ( ), 'current_page' => false, )), 2 => \WP_Post::__set_state(array( 'ID' => 46468, 'post_author' => '3', 'post_date' => '2024-12-03 15:48:21', 'post_date_gmt' => '2024-12-03 20:48:21', 'post_content' => ' ', 'post_title' => '', 'post_excerpt' => '', 'post_status' => 'publish', 'comment_status' => 'closed', 'ping_status' => 'closed', 'post_password' => '', 'post_name' => '46468', 'to_ping' => '', 'pinged' => '', 'post_modified' => '2024-12-03 15:48:21', 'post_modified_gmt' => '2024-12-03 20:48:21', 'post_content_filtered' => '', 'post_parent' => 24, 'guid' => 'https://www.clay-king.com/?p=46468', 'menu_order' => 26, 'post_type' => 'nav_menu_item', 'post_mime_type' => '', 'comment_count' => '0', 'filter' => 'raw', 'db_id' => 46468, 'menu_item_parent' => '979', 'object_id' => '858', 'object' => 'product_cat', 'type' => 'taxonomy', 'type_label' => 'Category', 'url' => 'https://www.clay-king.com/product-category/kilns/knife/', 'title' => 'Knife Kilns', 'target' => '', 'attr_title' => '', 'description' => '', 'classes' => array ( 0 => '', ), 'xfn' => '', 'submenu_items' => array ( ), 'current_page' => false, )), ), 'current_page' => false, )) Kilns
- \WP_Post::__set_state(array( 'ID' => 980, 'post_author' => '3', 'post_date' => '2024-12-03 15:48:21', 'post_date_gmt' => '2022-12-21 20:30:51', 'post_content' => ' ', 'post_title' => '', 'post_excerpt' => '', 'post_status' => 'publish', 'comment_status' => 'closed', 'ping_status' => 'closed', 'post_password' => '', 'post_name' => '980', 'to_ping' => '', 'pinged' => '', 'post_modified' => '2024-12-03 15:48:21', 'post_modified_gmt' => '2024-12-03 20:48:21', 'post_content_filtered' => '', 'post_parent' => 0, 'guid' => 'http://clay-king.local/?p=980', 'menu_order' => 27, 'post_type' => 'nav_menu_item', 'post_mime_type' => '', 'comment_count' => '0', 'filter' => 'raw', 'db_id' => 980, 'menu_item_parent' => '0', 'object_id' => '25', 'object' => 'product_cat', 'type' => 'taxonomy', 'type_label' => 'Category', 'url' => 'https://www.clay-king.com/product-category/pottery-wheels/', 'title' => 'Pottery Wheels', 'target' => '', 'attr_title' => '', 'description' => '', 'classes' => array ( 0 => '', ), 'xfn' => '', 'submenu_items' => array ( ), 'current_page' => false, )) Pottery Wheels
- \WP_Post::__set_state(array( 'ID' => 947, 'post_author' => '3', 'post_date' => '2024-12-03 15:48:21', 'post_date_gmt' => '2022-12-21 20:26:38', 'post_content' => ' ', 'post_title' => '', 'post_excerpt' => '', 'post_status' => 'publish', 'comment_status' => 'closed', 'ping_status' => 'closed', 'post_password' => '', 'post_name' => '947', 'to_ping' => '', 'pinged' => '', 'post_modified' => '2024-12-03 15:48:21', 'post_modified_gmt' => '2024-12-03 20:48:21', 'post_content_filtered' => '', 'post_parent' => 0, 'guid' => 'http://clay-king.local/?p=947', 'menu_order' => 28, 'post_type' => 'nav_menu_item', 'post_mime_type' => '', 'comment_count' => '0', 'filter' => 'raw', 'db_id' => 947, 'menu_item_parent' => '0', 'object_id' => '29', 'object' => 'product_cat', 'type' => 'taxonomy', 'type_label' => 'Category', 'url' => 'https://www.clay-king.com/product-category/other-equipment/', 'title' => 'Other Equipment', 'target' => '', 'attr_title' => '', 'description' => '', 'classes' => array ( 0 => '', ), 'xfn' => '', 'submenu_items' => array ( 0 => \WP_Post::__set_state(array( 'ID' => 953, 'post_author' => '3', 'post_date' => '2024-12-03 15:48:21', 'post_date_gmt' => '2022-12-21 20:26:38', 'post_content' => ' ', 'post_title' => '', 'post_excerpt' => '', 'post_status' => 'publish', 'comment_status' => 'closed', 'ping_status' => 'closed', 'post_password' => '', 'post_name' => '953', 'to_ping' => '', 'pinged' => '', 'post_modified' => '2024-12-03 15:48:21', 'post_modified_gmt' => '2024-12-03 20:48:21', 'post_content_filtered' => '', 'post_parent' => 29, 'guid' => 'http://clay-king.local/?p=953', 'menu_order' => 29, 'post_type' => 'nav_menu_item', 'post_mime_type' => '', 'comment_count' => '0', 'filter' => 'raw', 'db_id' => 953, 'menu_item_parent' => '947', 'object_id' => '56', 'object' => 'product_cat', 'type' => 'taxonomy', 'type_label' => 'Category', 'url' => 'https://www.clay-king.com/product-category/other-equipment/slab-rollers/', 'title' => 'Slab Rollers', 'target' => '', 'attr_title' => '', 'description' => '', 'classes' => array ( 0 => '', ), 'xfn' => '', 'submenu_items' => array ( ), 'current_page' => false, )), 1 => \WP_Post::__set_state(array( 'ID' => 950, 'post_author' => '3', 'post_date' => '2024-12-03 15:48:21', 'post_date_gmt' => '2022-12-21 20:26:38', 'post_content' => ' ', 'post_title' => '', 'post_excerpt' => '', 'post_status' => 'publish', 'comment_status' => 'closed', 'ping_status' => 'closed', 'post_password' => '', 'post_name' => '950', 'to_ping' => '', 'pinged' => '', 'post_modified' => '2024-12-03 15:48:21', 'post_modified_gmt' => '2024-12-03 20:48:21', 'post_content_filtered' => '', 'post_parent' => 29, 'guid' => 'http://clay-king.local/?p=950', 'menu_order' => 30, 'post_type' => 'nav_menu_item', 'post_mime_type' => '', 'comment_count' => '0', 'filter' => 'raw', 'db_id' => 950, 'menu_item_parent' => '947', 'object_id' => '57', 'object' => 'product_cat', 'type' => 'taxonomy', 'type_label' => 'Category', 'url' => 'https://www.clay-king.com/product-category/other-equipment/clay-extruders/', 'title' => 'Clay Extruders', 'target' => '', 'attr_title' => '', 'description' => '', 'classes' => array ( 0 => '', ), 'xfn' => '', 'submenu_items' => array ( ), 'current_page' => false, )), 2 => \WP_Post::__set_state(array( 'ID' => 952, 'post_author' => '3', 'post_date' => '2024-12-03 15:48:21', 'post_date_gmt' => '2022-12-21 20:26:38', 'post_content' => ' ', 'post_title' => '', 'post_excerpt' => '', 'post_status' => 'publish', 'comment_status' => 'closed', 'ping_status' => 'closed', 'post_password' => '', 'post_name' => '952', 'to_ping' => '', 'pinged' => '', 'post_modified' => '2024-12-03 15:48:21', 'post_modified_gmt' => '2024-12-03 20:48:21', 'post_content_filtered' => '', 'post_parent' => 29, 'guid' => 'http://clay-king.local/?p=952', 'menu_order' => 31, 'post_type' => 'nav_menu_item', 'post_mime_type' => '', 'comment_count' => '0', 'filter' => 'raw', 'db_id' => 952, 'menu_item_parent' => '947', 'object_id' => '58', 'object' => 'product_cat', 'type' => 'taxonomy', 'type_label' => 'Category', 'url' => 'https://www.clay-king.com/product-category/other-equipment/pugmills/', 'title' => 'Pugmills', 'target' => '', 'attr_title' => '', 'description' => '', 'classes' => array ( 0 => '', ), 'xfn' => '', 'submenu_items' => array ( ), 'current_page' => false, )), 3 => \WP_Post::__set_state(array( 'ID' => 951, 'post_author' => '3', 'post_date' => '2024-12-03 15:48:21', 'post_date_gmt' => '2022-12-21 20:26:38', 'post_content' => ' ', 'post_title' => '', 'post_excerpt' => '', 'post_status' => 'publish', 'comment_status' => 'closed', 'ping_status' => 'closed', 'post_password' => '', 'post_name' => '951', 'to_ping' => '', 'pinged' => '', 'post_modified' => '2024-12-03 15:48:21', 'post_modified_gmt' => '2024-12-03 20:48:21', 'post_content_filtered' => '', 'post_parent' => 29, 'guid' => 'http://clay-king.local/?p=951', 'menu_order' => 32, 'post_type' => 'nav_menu_item', 'post_mime_type' => '', 'comment_count' => '0', 'filter' => 'raw', 'db_id' => 951, 'menu_item_parent' => '947', 'object_id' => '59', 'object' => 'product_cat', 'type' => 'taxonomy', 'type_label' => 'Category', 'url' => 'https://www.clay-king.com/product-category/other-equipment/mixers/', 'title' => 'Mixers', 'target' => '', 'attr_title' => '', 'description' => '', 'classes' => array ( 0 => '', ), 'xfn' => '', 'submenu_items' => array ( ), 'current_page' => false, )), 4 => \WP_Post::__set_state(array( 'ID' => 948, 'post_author' => '3', 'post_date' => '2024-12-03 15:48:21', 'post_date_gmt' => '2022-12-21 20:26:38', 'post_content' => ' ', 'post_title' => '', 'post_excerpt' => '', 'post_status' => 'publish', 'comment_status' => 'closed', 'ping_status' => 'closed', 'post_password' => '', 'post_name' => '948', 'to_ping' => '', 'pinged' => '', 'post_modified' => '2024-12-03 15:48:21', 'post_modified_gmt' => '2024-12-03 20:48:21', 'post_content_filtered' => '', 'post_parent' => 29, 'guid' => 'http://clay-king.local/?p=948', 'menu_order' => 33, 'post_type' => 'nav_menu_item', 'post_mime_type' => '', 'comment_count' => '0', 'filter' => 'raw', 'db_id' => 948, 'menu_item_parent' => '947', 'object_id' => '60', 'object' => 'product_cat', 'type' => 'taxonomy', 'type_label' => 'Category', 'url' => 'https://www.clay-king.com/product-category/other-equipment/3d-ceramic-printers/', 'title' => '3D Ceramic Printers', 'target' => '', 'attr_title' => '', 'description' => '', 'classes' => array ( 0 => '', ), 'xfn' => '', 'submenu_items' => array ( ), 'current_page' => false, )), 5 => \WP_Post::__set_state(array( 'ID' => 949, 'post_author' => '3', 'post_date' => '2024-12-03 15:48:21', 'post_date_gmt' => '2022-12-21 20:26:38', 'post_content' => ' ', 'post_title' => '', 'post_excerpt' => '', 'post_status' => 'publish', 'comment_status' => 'closed', 'ping_status' => 'closed', 'post_password' => '', 'post_name' => '949', 'to_ping' => '', 'pinged' => '', 'post_modified' => '2024-12-03 15:48:21', 'post_modified_gmt' => '2024-12-03 20:48:21', 'post_content_filtered' => '', 'post_parent' => 29, 'guid' => 'http://clay-king.local/?p=949', 'menu_order' => 34, 'post_type' => 'nav_menu_item', 'post_mime_type' => '', 'comment_count' => '0', 'filter' => 'raw', 'db_id' => 949, 'menu_item_parent' => '947', 'object_id' => '61', 'object' => 'product_cat', 'type' => 'taxonomy', 'type_label' => 'Category', 'url' => 'https://www.clay-king.com/product-category/other-equipment/airbrushes-equipment/', 'title' => 'Airbrushes & Equipment', 'target' => '', 'attr_title' => '', 'description' => '', 'classes' => array ( 0 => '', ), 'xfn' => '', 'submenu_items' => array ( ), 'current_page' => false, )), 6 => \WP_Post::__set_state(array( 'ID' => 954, 'post_author' => '3', 'post_date' => '2024-12-03 15:48:21', 'post_date_gmt' => '2022-12-21 20:26:38', 'post_content' => ' ', 'post_title' => '', 'post_excerpt' => '', 'post_status' => 'publish', 'comment_status' => 'closed', 'ping_status' => 'closed', 'post_password' => '', 'post_name' => '954', 'to_ping' => '', 'pinged' => '', 'post_modified' => '2024-12-03 15:48:21', 'post_modified_gmt' => '2024-12-03 20:48:21', 'post_content_filtered' => '', 'post_parent' => 29, 'guid' => 'http://clay-king.local/?p=954', 'menu_order' => 35, 'post_type' => 'nav_menu_item', 'post_mime_type' => '', 'comment_count' => '0', 'filter' => 'raw', 'db_id' => 954, 'menu_item_parent' => '947', 'object_id' => '62', 'object' => 'product_cat', 'type' => 'taxonomy', 'type_label' => 'Category', 'url' => 'https://www.clay-king.com/product-category/other-equipment/tables-carts/', 'title' => 'Tables & Carts', 'target' => '', 'attr_title' => '', 'description' => '', 'classes' => array ( 0 => '', ), 'xfn' => '', 'submenu_items' => array ( ), 'current_page' => false, )), ), 'current_page' => false, )) Other Equipment
- \WP_Post::__set_state(array( 'ID' => 969, 'post_author' => '3', 'post_date' => '2024-12-03 15:48:21', 'post_date_gmt' => '2022-12-21 20:29:28', 'post_content' => ' ', 'post_title' => '', 'post_excerpt' => '', 'post_status' => 'publish', 'comment_status' => 'closed', 'ping_status' => 'closed', 'post_password' => '', 'post_name' => '969', 'to_ping' => '', 'pinged' => '', 'post_modified' => '2024-12-03 15:48:21', 'post_modified_gmt' => '2024-12-03 20:48:21', 'post_content_filtered' => '', 'post_parent' => 0, 'guid' => 'http://clay-king.local/?p=969', 'menu_order' => 36, 'post_type' => 'nav_menu_item', 'post_mime_type' => '', 'comment_count' => '0', 'filter' => 'raw', 'db_id' => 969, 'menu_item_parent' => '0', 'object_id' => '26', 'object' => 'product_cat', 'type' => 'taxonomy', 'type_label' => 'Category', 'url' => 'https://www.clay-king.com/product-category/accessories/', 'title' => 'Accessories', 'target' => '', 'attr_title' => '', 'description' => '', 'classes' => array ( 0 => '', ), 'xfn' => '', 'submenu_items' => array ( 0 => \WP_Post::__set_state(array( 'ID' => 40517, 'post_author' => '3', 'post_date' => '2024-12-03 15:48:21', 'post_date_gmt' => '2024-08-13 15:34:01', 'post_content' => ' ', 'post_title' => '', 'post_excerpt' => '', 'post_status' => 'publish', 'comment_status' => 'closed', 'ping_status' => 'closed', 'post_password' => '', 'post_name' => '40517', 'to_ping' => '', 'pinged' => '', 'post_modified' => '2024-12-03 15:48:21', 'post_modified_gmt' => '2024-12-03 20:48:21', 'post_content_filtered' => '', 'post_parent' => 26, 'guid' => 'https://clay-king.local/?p=40517', 'menu_order' => 37, 'post_type' => 'nav_menu_item', 'post_mime_type' => '', 'comment_count' => '0', 'filter' => 'raw', 'db_id' => 40517, 'menu_item_parent' => '969', 'object_id' => '486', 'object' => 'product_cat', 'type' => 'taxonomy', 'type_label' => 'Category', 'url' => 'https://www.clay-king.com/product-category/accessories/glaze/', 'title' => 'Glaze', 'target' => '', 'attr_title' => '', 'description' => '', 'classes' => array ( 0 => '', ), 'xfn' => '', 'submenu_items' => array ( ), 'current_page' => false, )), 1 => \WP_Post::__set_state(array( 'ID' => 40516, 'post_author' => '3', 'post_date' => '2024-12-03 15:48:21', 'post_date_gmt' => '2024-08-13 15:34:01', 'post_content' => ' ', 'post_title' => '', 'post_excerpt' => '', 'post_status' => 'publish', 'comment_status' => 'closed', 'ping_status' => 'closed', 'post_password' => '', 'post_name' => '40516', 'to_ping' => '', 'pinged' => '', 'post_modified' => '2024-12-03 15:48:21', 'post_modified_gmt' => '2024-12-03 20:48:21', 'post_content_filtered' => '', 'post_parent' => 26, 'guid' => 'https://clay-king.local/?p=40516', 'menu_order' => 38, 'post_type' => 'nav_menu_item', 'post_mime_type' => '', 'comment_count' => '0', 'filter' => 'raw', 'db_id' => 40516, 'menu_item_parent' => '969', 'object_id' => '485', 'object' => 'product_cat', 'type' => 'taxonomy', 'type_label' => 'Category', 'url' => 'https://www.clay-king.com/product-category/accessories/clay-accessories/', 'title' => 'Clay', 'target' => '', 'attr_title' => '', 'description' => '', 'classes' => array ( 0 => '', ), 'xfn' => '', 'submenu_items' => array ( ), 'current_page' => false, )), 2 => \WP_Post::__set_state(array( 'ID' => 40518, 'post_author' => '3', 'post_date' => '2024-12-03 15:48:21', 'post_date_gmt' => '2024-08-13 15:34:01', 'post_content' => ' ', 'post_title' => '', 'post_excerpt' => '', 'post_status' => 'publish', 'comment_status' => 'closed', 'ping_status' => 'closed', 'post_password' => '', 'post_name' => '40518', 'to_ping' => '', 'pinged' => '', 'post_modified' => '2024-12-03 15:48:21', 'post_modified_gmt' => '2024-12-03 20:48:21', 'post_content_filtered' => '', 'post_parent' => 26, 'guid' => 'https://clay-king.local/?p=40518', 'menu_order' => 39, 'post_type' => 'nav_menu_item', 'post_mime_type' => '', 'comment_count' => '0', 'filter' => 'raw', 'db_id' => 40518, 'menu_item_parent' => '969', 'object_id' => '484', 'object' => 'product_cat', 'type' => 'taxonomy', 'type_label' => 'Category', 'url' => 'https://www.clay-king.com/product-category/accessories/kiln-accessories/', 'title' => 'Kiln Accessories', 'target' => '', 'attr_title' => '', 'description' => '', 'classes' => array ( 0 => '', ), 'xfn' => '', 'submenu_items' => array ( ), 'current_page' => false, )), 3 => \WP_Post::__set_state(array( 'ID' => 40521, 'post_author' => '3', 'post_date' => '2024-12-03 15:48:21', 'post_date_gmt' => '2024-08-13 15:34:01', 'post_content' => ' ', 'post_title' => '', 'post_excerpt' => '', 'post_status' => 'publish', 'comment_status' => 'closed', 'ping_status' => 'closed', 'post_password' => '', 'post_name' => '40521', 'to_ping' => '', 'pinged' => '', 'post_modified' => '2024-12-03 15:48:21', 'post_modified_gmt' => '2024-12-03 20:48:21', 'post_content_filtered' => '', 'post_parent' => 26, 'guid' => 'https://clay-king.local/?p=40521', 'menu_order' => 40, 'post_type' => 'nav_menu_item', 'post_mime_type' => '', 'comment_count' => '0', 'filter' => 'raw', 'db_id' => 40521, 'menu_item_parent' => '969', 'object_id' => '483', 'object' => 'product_cat', 'type' => 'taxonomy', 'type_label' => 'Category', 'url' => 'https://www.clay-king.com/product-category/accessories/wheel/', 'title' => 'Wheel Accessories', 'target' => '', 'attr_title' => '', 'description' => '', 'classes' => array ( 0 => '', ), 'xfn' => '', 'submenu_items' => array ( ), 'current_page' => false, )), 4 => \WP_Post::__set_state(array( 'ID' => 40531, 'post_author' => '3', 'post_date' => '2024-12-03 15:48:21', 'post_date_gmt' => '2024-08-13 15:34:47', 'post_content' => ' ', 'post_title' => '', 'post_excerpt' => '', 'post_status' => 'publish', 'comment_status' => 'closed', 'ping_status' => 'closed', 'post_password' => '', 'post_name' => '40531', 'to_ping' => '', 'pinged' => '', 'post_modified' => '2024-12-03 15:48:21', 'post_modified_gmt' => '2024-12-03 20:48:21', 'post_content_filtered' => '', 'post_parent' => 26, 'guid' => 'https://clay-king.local/?p=40531', 'menu_order' => 41, 'post_type' => 'nav_menu_item', 'post_mime_type' => '', 'comment_count' => '0', 'filter' => 'raw', 'db_id' => 40531, 'menu_item_parent' => '969', 'object_id' => '488', 'object' => 'product_cat', 'type' => 'taxonomy', 'type_label' => 'Category', 'url' => 'https://www.clay-king.com/product-category/accessories/other-equipment-accessories/', 'title' => 'Other Equipment', 'target' => '', 'attr_title' => '', 'description' => '', 'classes' => array ( 0 => '', ), 'xfn' => '', 'submenu_items' => array ( ), 'current_page' => false, )), ), 'current_page' => false, )) Accessories
- \WP_Post::__set_state(array( 'ID' => 981, 'post_author' => '3', 'post_date' => '2024-12-03 15:48:21', 'post_date_gmt' => '2022-12-21 20:30:52', 'post_content' => ' ', 'post_title' => '', 'post_excerpt' => '', 'post_status' => 'publish', 'comment_status' => 'closed', 'ping_status' => 'closed', 'post_password' => '', 'post_name' => '981', 'to_ping' => '', 'pinged' => '', 'post_modified' => '2024-12-03 15:48:21', 'post_modified_gmt' => '2024-12-03 20:48:21', 'post_content_filtered' => '', 'post_parent' => 0, 'guid' => 'http://clay-king.local/?p=981', 'menu_order' => 42, 'post_type' => 'nav_menu_item', 'post_mime_type' => '', 'comment_count' => '0', 'filter' => 'raw', 'db_id' => 981, 'menu_item_parent' => '0', 'object_id' => '31', 'object' => 'product_cat', 'type' => 'taxonomy', 'type_label' => 'Category', 'url' => 'https://www.clay-king.com/product-category/instructional/', 'title' => 'Instructional', 'target' => '', 'attr_title' => '', 'description' => '', 'classes' => array ( 0 => '', ), 'xfn' => '', 'submenu_items' => array ( ), 'current_page' => false, )) Instructional
- \WP_Post::__set_state(array( 'ID' => 40553, 'post_author' => '3', 'post_date' => '2024-12-03 15:48:21', 'post_date_gmt' => '2024-08-14 19:33:43', 'post_content' => 'For our local potters in Upstate South Carolina, Clay-King hosts regular classes and workshops to hone your skills!', 'post_title' => '', 'post_excerpt' => '', 'post_status' => 'publish', 'comment_status' => 'closed', 'ping_status' => 'closed', 'post_password' => '', 'post_name' => '40553', 'to_ping' => '', 'pinged' => '', 'post_modified' => '2024-12-03 15:48:21', 'post_modified_gmt' => '2024-12-03 20:48:21', 'post_content_filtered' => '', 'post_parent' => 0, 'guid' => 'https://clay-king.local/?p=40553', 'menu_order' => 43, 'post_type' => 'nav_menu_item', 'post_mime_type' => '', 'comment_count' => '0', 'filter' => 'raw', 'db_id' => 40553, 'menu_item_parent' => '0', 'object_id' => '654', 'object' => 'product_cat', 'type' => 'taxonomy', 'type_label' => 'Category', 'url' => 'https://www.clay-king.com/product-category/classes/', 'title' => 'Classes', 'target' => '', 'attr_title' => '', 'description' => 'For our local potters in Upstate South Carolina, Clay-King hosts regular classes and workshops to hone your skills!', 'classes' => array ( 0 => '', ), 'xfn' => '', 'submenu_items' => array ( ), 'current_page' => false, )) Classes
- \WP_Post::__set_state(array( 'ID' => 942, 'post_author' => '3', 'post_date' => '2024-12-03 15:48:21', 'post_date_gmt' => '2022-12-21 20:26:38', 'post_content' => ' ', 'post_title' => '', 'post_excerpt' => '', 'post_status' => 'publish', 'comment_status' => 'closed', 'ping_status' => 'closed', 'post_password' => '', 'post_name' => '942', 'to_ping' => '', 'pinged' => '', 'post_modified' => '2024-12-03 15:48:21', 'post_modified_gmt' => '2024-12-03 20:48:21', 'post_content_filtered' => '', 'post_parent' => 0, 'guid' => 'http://clay-king.local/?p=942', 'menu_order' => 44, 'post_type' => 'nav_menu_item', 'post_mime_type' => '', 'comment_count' => '0', 'filter' => 'raw', 'db_id' => 942, 'menu_item_parent' => '0', 'object_id' => '30', 'object' => 'product_cat', 'type' => 'taxonomy', 'type_label' => 'Category', 'url' => 'https://www.clay-king.com/product-category/slip-casting/', 'title' => 'Slip Casting', 'target' => '', 'attr_title' => '', 'description' => '', 'classes' => array ( 0 => '', ), 'xfn' => '', 'submenu_items' => array ( 0 => \WP_Post::__set_state(array( 'ID' => 945, 'post_author' => '3', 'post_date' => '2024-12-03 15:48:21', 'post_date_gmt' => '2022-12-21 20:26:38', 'post_content' => ' ', 'post_title' => '', 'post_excerpt' => '', 'post_status' => 'publish', 'comment_status' => 'closed', 'ping_status' => 'closed', 'post_password' => '', 'post_name' => '945', 'to_ping' => '', 'pinged' => '', 'post_modified' => '2024-12-03 15:48:21', 'post_modified_gmt' => '2024-12-03 20:48:21', 'post_content_filtered' => '', 'post_parent' => 30, 'guid' => 'http://clay-king.local/?p=945', 'menu_order' => 45, 'post_type' => 'nav_menu_item', 'post_mime_type' => '', 'comment_count' => '0', 'filter' => 'raw', 'db_id' => 945, 'menu_item_parent' => '942', 'object_id' => '64', 'object' => 'product_cat', 'type' => 'taxonomy', 'type_label' => 'Category', 'url' => 'https://www.clay-king.com/product-category/slip-casting/cottle-boards/', 'title' => 'Cottle Boards', 'target' => '', 'attr_title' => '', 'description' => '', 'classes' => array ( 0 => '', ), 'xfn' => '', 'submenu_items' => array ( ), 'current_page' => false, )), 1 => \WP_Post::__set_state(array( 'ID' => 944, 'post_author' => '3', 'post_date' => '2024-12-03 15:48:21', 'post_date_gmt' => '2022-12-21 20:26:38', 'post_content' => ' ', 'post_title' => '', 'post_excerpt' => '', 'post_status' => 'publish', 'comment_status' => 'closed', 'ping_status' => 'closed', 'post_password' => '', 'post_name' => '944', 'to_ping' => '', 'pinged' => '', 'post_modified' => '2024-12-03 15:48:21', 'post_modified_gmt' => '2024-12-03 20:48:21', 'post_content_filtered' => '', 'post_parent' => 30, 'guid' => 'http://clay-king.local/?p=944', 'menu_order' => 46, 'post_type' => 'nav_menu_item', 'post_mime_type' => '', 'comment_count' => '0', 'filter' => 'raw', 'db_id' => 944, 'menu_item_parent' => '942', 'object_id' => '63', 'object' => 'product_cat', 'type' => 'taxonomy', 'type_label' => 'Category', 'url' => 'https://www.clay-king.com/product-category/slip-casting/slip-casting-equipment/', 'title' => 'Slip Casting Equipment', 'target' => '', 'attr_title' => '', 'description' => '', 'classes' => array ( 0 => '', ), 'xfn' => '', 'submenu_items' => array ( ), 'current_page' => false, )), 2 => \WP_Post::__set_state(array( 'ID' => 943, 'post_author' => '3', 'post_date' => '2024-12-03 15:48:21', 'post_date_gmt' => '2022-12-21 20:26:38', 'post_content' => ' ', 'post_title' => '', 'post_excerpt' => '', 'post_status' => 'publish', 'comment_status' => 'closed', 'ping_status' => 'closed', 'post_password' => '', 'post_name' => '943', 'to_ping' => '', 'pinged' => '', 'post_modified' => '2024-12-03 15:48:21', 'post_modified_gmt' => '2024-12-03 20:48:21', 'post_content_filtered' => '', 'post_parent' => 30, 'guid' => 'http://clay-king.local/?p=943', 'menu_order' => 47, 'post_type' => 'nav_menu_item', 'post_mime_type' => '', 'comment_count' => '0', 'filter' => 'raw', 'db_id' => 943, 'menu_item_parent' => '942', 'object_id' => '66', 'object' => 'product_cat', 'type' => 'taxonomy', 'type_label' => 'Category', 'url' => 'https://www.clay-king.com/product-category/slip-casting/slip-casting-accessories/', 'title' => 'Slip Casting Accessories', 'target' => '', 'attr_title' => '', 'description' => '', 'classes' => array ( 0 => '', ), 'xfn' => '', 'submenu_items' => array ( ), 'current_page' => false, )), ), 'current_page' => false, )) Slip Casting
- \WP_Post::__set_state(array( 'ID' => 977, 'post_author' => '3', 'post_date' => '2024-12-03 15:48:21', 'post_date_gmt' => '2022-12-21 20:30:51', 'post_content' => ' ', 'post_title' => '', 'post_excerpt' => '', 'post_status' => 'publish', 'comment_status' => 'closed', 'ping_status' => 'closed', 'post_password' => '', 'post_name' => '977', 'to_ping' => '', 'pinged' => '', 'post_modified' => '2024-12-03 15:48:21', 'post_modified_gmt' => '2024-12-03 20:48:21', 'post_content_filtered' => '', 'post_parent' => 0, 'guid' => 'http://clay-king.local/?p=977', 'menu_order' => 48, 'post_type' => 'nav_menu_item', 'post_mime_type' => '', 'comment_count' => '0', 'filter' => 'raw', 'db_id' => 977, 'menu_item_parent' => '0', 'object_id' => '22', 'object' => 'product_cat', 'type' => 'taxonomy', 'type_label' => 'Category', 'url' => 'https://www.clay-king.com/product-category/bisqueware/', 'title' => 'Bisqueware', 'target' => '', 'attr_title' => '', 'description' => '', 'classes' => array ( 0 => '', ), 'xfn' => '', 'submenu_items' => array ( 0 => \WP_Post::__set_state(array( 'ID' => 40506, 'post_author' => '3', 'post_date' => '2024-12-03 15:48:21', 'post_date_gmt' => '2024-08-13 15:34:01', 'post_content' => ' ', 'post_title' => '', 'post_excerpt' => '', 'post_status' => 'publish', 'comment_status' => 'closed', 'ping_status' => 'closed', 'post_password' => '', 'post_name' => '40506', 'to_ping' => '', 'pinged' => '', 'post_modified' => '2024-12-03 15:48:21', 'post_modified_gmt' => '2024-12-03 20:48:21', 'post_content_filtered' => '', 'post_parent' => 22, 'guid' => 'https://clay-king.local/?p=40506', 'menu_order' => 49, 'post_type' => 'nav_menu_item', 'post_mime_type' => '', 'comment_count' => '0', 'filter' => 'raw', 'db_id' => 40506, 'menu_item_parent' => '977', 'object_id' => '400', 'object' => 'product_cat', 'type' => 'taxonomy', 'type_label' => 'Category', 'url' => 'https://www.clay-king.com/product-category/bisqueware/animals/', 'title' => 'Animals', 'target' => '', 'attr_title' => '', 'description' => '', 'classes' => array ( 0 => '', ), 'xfn' => '', 'submenu_items' => array ( ), 'current_page' => false, )), 1 => \WP_Post::__set_state(array( 'ID' => 40507, 'post_author' => '3', 'post_date' => '2024-12-03 15:48:21', 'post_date_gmt' => '2024-08-13 15:34:01', 'post_content' => ' ', 'post_title' => '', 'post_excerpt' => '', 'post_status' => 'publish', 'comment_status' => 'closed', 'ping_status' => 'closed', 'post_password' => '', 'post_name' => '40507', 'to_ping' => '', 'pinged' => '', 'post_modified' => '2024-12-03 15:48:21', 'post_modified_gmt' => '2024-12-03 20:48:21', 'post_content_filtered' => '', 'post_parent' => 22, 'guid' => 'https://clay-king.local/?p=40507', 'menu_order' => 50, 'post_type' => 'nav_menu_item', 'post_mime_type' => '', 'comment_count' => '0', 'filter' => 'raw', 'db_id' => 40507, 'menu_item_parent' => '977', 'object_id' => '401', 'object' => 'product_cat', 'type' => 'taxonomy', 'type_label' => 'Category', 'url' => 'https://www.clay-king.com/product-category/bisqueware/banks-boxes/', 'title' => 'Banks & Boxes', 'target' => '', 'attr_title' => '', 'description' => '', 'classes' => array ( 0 => '', ), 'xfn' => '', 'submenu_items' => array ( ), 'current_page' => false, )), 2 => \WP_Post::__set_state(array( 'ID' => 40508, 'post_author' => '3', 'post_date' => '2024-12-03 15:48:21', 'post_date_gmt' => '2024-08-13 15:34:01', 'post_content' => ' ', 'post_title' => '', 'post_excerpt' => '', 'post_status' => 'publish', 'comment_status' => 'closed', 'ping_status' => 'closed', 'post_password' => '', 'post_name' => '40508', 'to_ping' => '', 'pinged' => '', 'post_modified' => '2024-12-03 15:48:21', 'post_modified_gmt' => '2024-12-03 20:48:21', 'post_content_filtered' => '', 'post_parent' => 22, 'guid' => 'https://clay-king.local/?p=40508', 'menu_order' => 51, 'post_type' => 'nav_menu_item', 'post_mime_type' => '', 'comment_count' => '0', 'filter' => 'raw', 'db_id' => 40508, 'menu_item_parent' => '977', 'object_id' => '402', 'object' => 'product_cat', 'type' => 'taxonomy', 'type_label' => 'Category', 'url' => 'https://www.clay-king.com/product-category/bisqueware/bowls/', 'title' => 'Bowls', 'target' => '', 'attr_title' => '', 'description' => '', 'classes' => array ( 0 => '', ), 'xfn' => '', 'submenu_items' => array ( ), 'current_page' => false, )), 3 => \WP_Post::__set_state(array( 'ID' => 40509, 'post_author' => '3', 'post_date' => '2024-12-03 15:48:21', 'post_date_gmt' => '2024-08-13 15:34:01', 'post_content' => ' ', 'post_title' => '', 'post_excerpt' => '', 'post_status' => 'publish', 'comment_status' => 'closed', 'ping_status' => 'closed', 'post_password' => '', 'post_name' => '40509', 'to_ping' => '', 'pinged' => '', 'post_modified' => '2024-12-03 15:48:21', 'post_modified_gmt' => '2024-12-03 20:48:21', 'post_content_filtered' => '', 'post_parent' => 22, 'guid' => 'https://clay-king.local/?p=40509', 'menu_order' => 52, 'post_type' => 'nav_menu_item', 'post_mime_type' => '', 'comment_count' => '0', 'filter' => 'raw', 'db_id' => 40509, 'menu_item_parent' => '977', 'object_id' => '412', 'object' => 'product_cat', 'type' => 'taxonomy', 'type_label' => 'Category', 'url' => 'https://www.clay-king.com/product-category/bisqueware/dal-bisque-tiles/', 'title' => 'Dal Bisque Tiles', 'target' => '', 'attr_title' => '', 'description' => '', 'classes' => array ( 0 => '', ), 'xfn' => '', 'submenu_items' => array ( ), 'current_page' => false, )), 4 => \WP_Post::__set_state(array( 'ID' => 40510, 'post_author' => '3', 'post_date' => '2024-12-03 15:48:21', 'post_date_gmt' => '2024-08-13 15:34:01', 'post_content' => ' ', 'post_title' => '', 'post_excerpt' => '', 'post_status' => 'publish', 'comment_status' => 'closed', 'ping_status' => 'closed', 'post_password' => '', 'post_name' => '40510', 'to_ping' => '', 'pinged' => '', 'post_modified' => '2024-12-03 15:48:21', 'post_modified_gmt' => '2024-12-03 20:48:21', 'post_content_filtered' => '', 'post_parent' => 22, 'guid' => 'https://clay-king.local/?p=40510', 'menu_order' => 53, 'post_type' => 'nav_menu_item', 'post_mime_type' => '', 'comment_count' => '0', 'filter' => 'raw', 'db_id' => 40510, 'menu_item_parent' => '977', 'object_id' => '403', 'object' => 'product_cat', 'type' => 'taxonomy', 'type_label' => 'Category', 'url' => 'https://www.clay-king.com/product-category/bisqueware/drinkware/', 'title' => 'Drinkware', 'target' => '', 'attr_title' => '', 'description' => '', 'classes' => array ( 0 => '', ), 'xfn' => '', 'submenu_items' => array ( ), 'current_page' => false, )), 5 => \WP_Post::__set_state(array( 'ID' => 40511, 'post_author' => '3', 'post_date' => '2024-12-03 15:48:21', 'post_date_gmt' => '2024-08-13 15:34:01', 'post_content' => ' ', 'post_title' => '', 'post_excerpt' => '', 'post_status' => 'publish', 'comment_status' => 'closed', 'ping_status' => 'closed', 'post_password' => '', 'post_name' => '40511', 'to_ping' => '', 'pinged' => '', 'post_modified' => '2024-12-03 15:48:21', 'post_modified_gmt' => '2024-12-03 20:48:21', 'post_content_filtered' => '', 'post_parent' => 22, 'guid' => 'https://clay-king.local/?p=40511', 'menu_order' => 54, 'post_type' => 'nav_menu_item', 'post_mime_type' => '', 'comment_count' => '0', 'filter' => 'raw', 'db_id' => 40511, 'menu_item_parent' => '977', 'object_id' => '405', 'object' => 'product_cat', 'type' => 'taxonomy', 'type_label' => 'Category', 'url' => 'https://www.clay-king.com/product-category/bisqueware/holiday/', 'title' => 'Holiday', 'target' => '', 'attr_title' => '', 'description' => '', 'classes' => array ( 0 => '', ), 'xfn' => '', 'submenu_items' => array ( ), 'current_page' => false, )), 6 => \WP_Post::__set_state(array( 'ID' => 40512, 'post_author' => '3', 'post_date' => '2024-12-03 15:48:21', 'post_date_gmt' => '2024-08-13 15:34:01', 'post_content' => ' ', 'post_title' => '', 'post_excerpt' => '', 'post_status' => 'publish', 'comment_status' => 'closed', 'ping_status' => 'closed', 'post_password' => '', 'post_name' => '40512', 'to_ping' => '', 'pinged' => '', 'post_modified' => '2024-12-03 15:48:21', 'post_modified_gmt' => '2024-12-03 20:48:21', 'post_content_filtered' => '', 'post_parent' => 22, 'guid' => 'https://clay-king.local/?p=40512', 'menu_order' => 55, 'post_type' => 'nav_menu_item', 'post_mime_type' => '', 'comment_count' => '0', 'filter' => 'raw', 'db_id' => 40512, 'menu_item_parent' => '977', 'object_id' => '406', 'object' => 'product_cat', 'type' => 'taxonomy', 'type_label' => 'Category', 'url' => 'https://www.clay-king.com/product-category/bisqueware/jars-pitchers/', 'title' => 'Jars & Pitchers', 'target' => '', 'attr_title' => '', 'description' => '', 'classes' => array ( 0 => '', ), 'xfn' => '', 'submenu_items' => array ( ), 'current_page' => false, )), 7 => \WP_Post::__set_state(array( 'ID' => 40513, 'post_author' => '3', 'post_date' => '2024-12-03 15:48:21', 'post_date_gmt' => '2024-08-13 15:34:01', 'post_content' => ' ', 'post_title' => '', 'post_excerpt' => '', 'post_status' => 'publish', 'comment_status' => 'closed', 'ping_status' => 'closed', 'post_password' => '', 'post_name' => '40513', 'to_ping' => '', 'pinged' => '', 'post_modified' => '2024-12-03 15:48:21', 'post_modified_gmt' => '2024-12-03 20:48:21', 'post_content_filtered' => '', 'post_parent' => 22, 'guid' => 'https://clay-king.local/?p=40513', 'menu_order' => 56, 'post_type' => 'nav_menu_item', 'post_mime_type' => '', 'comment_count' => '0', 'filter' => 'raw', 'db_id' => 40513, 'menu_item_parent' => '977', 'object_id' => '409', 'object' => 'product_cat', 'type' => 'taxonomy', 'type_label' => 'Category', 'url' => 'https://www.clay-king.com/product-category/bisqueware/kitchen-bath/', 'title' => 'Kitchen & Bath', 'target' => '', 'attr_title' => '', 'description' => '', 'classes' => array ( 0 => '', ), 'xfn' => '', 'submenu_items' => array ( ), 'current_page' => false, )), 8 => \WP_Post::__set_state(array( 'ID' => 40514, 'post_author' => '3', 'post_date' => '2024-12-03 15:48:21', 'post_date_gmt' => '2024-08-13 15:34:01', 'post_content' => ' ', 'post_title' => '', 'post_excerpt' => '', 'post_status' => 'publish', 'comment_status' => 'closed', 'ping_status' => 'closed', 'post_password' => '', 'post_name' => '40514', 'to_ping' => '', 'pinged' => '', 'post_modified' => '2024-12-03 15:48:21', 'post_modified_gmt' => '2024-12-03 20:48:21', 'post_content_filtered' => '', 'post_parent' => 22, 'guid' => 'https://clay-king.local/?p=40514', 'menu_order' => 57, 'post_type' => 'nav_menu_item', 'post_mime_type' => '', 'comment_count' => '0', 'filter' => 'raw', 'db_id' => 40514, 'menu_item_parent' => '977', 'object_id' => '404', 'object' => 'product_cat', 'type' => 'taxonomy', 'type_label' => 'Category', 'url' => 'https://www.clay-king.com/product-category/bisqueware/miscellaneous/', 'title' => 'Miscellaneous', 'target' => '', 'attr_title' => '', 'description' => '', 'classes' => array ( 0 => '', ), 'xfn' => '', 'submenu_items' => array ( ), 'current_page' => false, )), 9 => \WP_Post::__set_state(array( 'ID' => 40515, 'post_author' => '3', 'post_date' => '2024-12-03 15:48:21', 'post_date_gmt' => '2024-08-13 15:34:01', 'post_content' => ' ', 'post_title' => '', 'post_excerpt' => '', 'post_status' => 'publish', 'comment_status' => 'closed', 'ping_status' => 'closed', 'post_password' => '', 'post_name' => '40515', 'to_ping' => '', 'pinged' => '', 'post_modified' => '2024-12-03 15:48:21', 'post_modified_gmt' => '2024-12-03 20:48:21', 'post_content_filtered' => '', 'post_parent' => 22, 'guid' => 'https://clay-king.local/?p=40515', 'menu_order' => 58, 'post_type' => 'nav_menu_item', 'post_mime_type' => '', 'comment_count' => '0', 'filter' => 'raw', 'db_id' => 40515, 'menu_item_parent' => '977', 'object_id' => '407', 'object' => 'product_cat', 'type' => 'taxonomy', 'type_label' => 'Category', 'url' => 'https://www.clay-king.com/product-category/bisqueware/plates-platters/', 'title' => 'Plates & Platters', 'target' => '', 'attr_title' => '', 'description' => '', 'classes' => array ( 0 => '', ), 'xfn' => '', 'submenu_items' => array ( ), 'current_page' => false, )), ), 'current_page' => false, )) Bisqueware
- \WP_Post::__set_state(array( 'ID' => 46203, 'post_author' => '3', 'post_date' => '2024-12-03 15:48:21', 'post_date_gmt' => '2024-11-27 01:44:37', 'post_content' => ' ', 'post_title' => '', 'post_excerpt' => '', 'post_status' => 'publish', 'comment_status' => 'closed', 'ping_status' => 'closed', 'post_password' => '', 'post_name' => '46203', 'to_ping' => '', 'pinged' => '', 'post_modified' => '2024-12-03 15:48:21', 'post_modified_gmt' => '2024-12-03 20:48:21', 'post_content_filtered' => '', 'post_parent' => 0, 'guid' => 'https://www.clay-king.com/?p=46203', 'menu_order' => 59, 'post_type' => 'nav_menu_item', 'post_mime_type' => '', 'comment_count' => '0', 'filter' => 'raw', 'db_id' => 46203, 'menu_item_parent' => '0', 'object_id' => '46202', 'object' => 'page', 'type' => 'post_type', 'type_label' => 'Page', 'url' => 'https://www.clay-king.com/?page_id=46202', 'title' => 'Wholesale Bisqueware', 'target' => '', 'attr_title' => '', 'description' => '', 'classes' => array ( 0 => '', ), 'xfn' => '', 'submenu_items' => array ( ), 'current_page' => false, )) Wholesale Bisqueware
- \WP_Post::__set_state(array( 'ID' => 40554, 'post_author' => '3', 'post_date' => '2024-12-03 15:48:21', 'post_date_gmt' => '2024-08-14 19:33:43', 'post_content' => ' ', 'post_title' => '', 'post_excerpt' => '', 'post_status' => 'publish', 'comment_status' => 'closed', 'ping_status' => 'closed', 'post_password' => '', 'post_name' => '40554', 'to_ping' => '', 'pinged' => '', 'post_modified' => '2024-12-03 15:48:21', 'post_modified_gmt' => '2024-12-03 20:48:21', 'post_content_filtered' => '', 'post_parent' => 0, 'guid' => 'https://clay-king.local/?p=40554', 'menu_order' => 60, 'post_type' => 'nav_menu_item', 'post_mime_type' => '', 'comment_count' => '0', 'filter' => 'raw', 'db_id' => 40554, 'menu_item_parent' => '0', 'object_id' => '34', 'object' => 'product_cat', 'type' => 'taxonomy', 'type_label' => 'Category', 'url' => 'https://www.clay-king.com/product-category/packages/', 'title' => 'Packages', 'target' => '', 'attr_title' => '', 'description' => '', 'classes' => array ( 0 => '', ), 'xfn' => '', 'submenu_items' => array ( ), 'current_page' => false, )) Packages
- \WP_Post::__set_state(array( 'ID' => 40555, 'post_author' => '3', 'post_date' => '2024-12-03 15:48:21', 'post_date_gmt' => '2024-08-14 19:33:43', 'post_content' => ' ', 'post_title' => '', 'post_excerpt' => '', 'post_status' => 'publish', 'comment_status' => 'closed', 'ping_status' => 'closed', 'post_password' => '', 'post_name' => '40555', 'to_ping' => '', 'pinged' => '', 'post_modified' => '2024-12-03 15:48:21', 'post_modified_gmt' => '2024-12-03 20:48:21', 'post_content_filtered' => '', 'post_parent' => 0, 'guid' => 'https://clay-king.local/?p=40555', 'menu_order' => 61, 'post_type' => 'nav_menu_item', 'post_mime_type' => '', 'comment_count' => '0', 'filter' => 'raw', 'db_id' => 40555, 'menu_item_parent' => '0', 'object_id' => '684', 'object' => 'product_cat', 'type' => 'taxonomy', 'type_label' => 'Category', 'url' => 'https://www.clay-king.com/product-category/gift-certificates/', 'title' => 'Gift Certificates', 'target' => '', 'attr_title' => '', 'description' => '', 'classes' => array ( 0 => '', ), 'xfn' => '', 'submenu_items' => array ( ), 'current_page' => false, )) Gift Certificates
- \WP_Post::__set_state(array( 'ID' => 45904, 'post_author' => '3', 'post_date' => '2024-12-03 15:48:21', 'post_date_gmt' => '2024-11-22 16:15:56', 'post_content' => ' ', 'post_title' => '', 'post_excerpt' => '', 'post_status' => 'publish', 'comment_status' => 'closed', 'ping_status' => 'closed', 'post_password' => '', 'post_name' => '45904', 'to_ping' => '', 'pinged' => '', 'post_modified' => '2024-12-03 15:48:21', 'post_modified_gmt' => '2024-12-03 20:48:21', 'post_content_filtered' => '', 'post_parent' => 0, 'guid' => 'https://www.clay-king.com/?p=45904', 'menu_order' => 62, 'post_type' => 'nav_menu_item', 'post_mime_type' => '', 'comment_count' => '0', 'filter' => 'raw', 'db_id' => 45904, 'menu_item_parent' => '0', 'object_id' => '478', 'object' => 'product_cat', 'type' => 'taxonomy', 'type_label' => 'Category', 'url' => 'https://www.clay-king.com/product-category/new-product-arrivals/', 'title' => 'New Product Arrivals', 'target' => '', 'attr_title' => '', 'description' => '', 'classes' => array ( 0 => '', ), 'xfn' => '', 'submenu_items' => array ( ), 'current_page' => false, )) New Product Arrivals
Categories
- \WP_Post::__set_state(array( 'ID' => 978, 'post_author' => '3', 'post_date' => '2024-12-03 15:48:20', 'post_date_gmt' => '2022-12-21 20:30:51', 'post_content' => ' ', 'post_title' => '', 'post_excerpt' => '', 'post_status' => 'publish', 'comment_status' => 'closed', 'ping_status' => 'closed', 'post_password' => '', 'post_name' => '978', 'to_ping' => '', 'pinged' => '', 'post_modified' => '2024-12-03 15:48:20', 'post_modified_gmt' => '2024-12-03 20:48:20', 'post_content_filtered' => '', 'post_parent' => 0, 'guid' => 'http://clay-king.local/?p=978', 'menu_order' => 1, 'post_type' => 'nav_menu_item', 'post_mime_type' => '', 'comment_count' => '0', 'filter' => 'raw', 'db_id' => 978, 'menu_item_parent' => '0', 'object_id' => '23', 'object' => 'product_cat', 'type' => 'taxonomy', 'type_label' => 'Category', 'url' => 'https://www.clay-king.com/product-category/clay/', 'title' => 'Clay', 'target' => '', 'attr_title' => '', 'description' => '', 'classes' => array ( 0 => '', ), 'xfn' => '', 'submenu_items' => array ( ), 'current_page' => false, )) Clay
- \WP_Post::__set_state(array( 'ID' => 955, 'post_author' => '3', 'post_date' => '2024-12-03 15:48:20', 'post_date_gmt' => '2022-12-21 20:26:38', 'post_content' => ' ', 'post_title' => '', 'post_excerpt' => '', 'post_status' => 'publish', 'comment_status' => 'closed', 'ping_status' => 'closed', 'post_password' => '', 'post_name' => '955', 'to_ping' => '', 'pinged' => '', 'post_modified' => '2024-12-03 15:48:20', 'post_modified_gmt' => '2024-12-03 20:48:20', 'post_content_filtered' => '', 'post_parent' => 0, 'guid' => 'http://clay-king.local/?p=955', 'menu_order' => 2, 'post_type' => 'nav_menu_item', 'post_mime_type' => '', 'comment_count' => '0', 'filter' => 'raw', 'db_id' => 955, 'menu_item_parent' => '0', 'object_id' => '28', 'object' => 'product_cat', 'type' => 'taxonomy', 'type_label' => 'Category', 'url' => 'https://www.clay-king.com/product-category/glazes/', 'title' => 'Glazes', 'target' => '', 'attr_title' => '', 'description' => '', 'classes' => array ( 0 => '', ), 'xfn' => '', 'submenu_items' => array ( 0 => \WP_Post::__set_state(array( 'ID' => 40525, 'post_author' => '3', 'post_date' => '2024-12-03 15:48:20', 'post_date_gmt' => '2024-08-13 15:34:02', 'post_content' => ' ', 'post_title' => '', 'post_excerpt' => '', 'post_status' => 'publish', 'comment_status' => 'closed', 'ping_status' => 'closed', 'post_password' => '', 'post_name' => '40525', 'to_ping' => '', 'pinged' => '', 'post_modified' => '2024-12-03 15:48:20', 'post_modified_gmt' => '2024-12-03 20:48:20', 'post_content_filtered' => '', 'post_parent' => 28, 'guid' => 'https://clay-king.local/?p=40525', 'menu_order' => 3, 'post_type' => 'nav_menu_item', 'post_mime_type' => '', 'comment_count' => '0', 'filter' => 'raw', 'db_id' => 40525, 'menu_item_parent' => '955', 'object_id' => '473', 'object' => 'product_cat', 'type' => 'taxonomy', 'type_label' => 'Category', 'url' => 'https://www.clay-king.com/product-category/glazes/no-fire/', 'title' => 'No Fire', 'target' => '', 'attr_title' => '', 'description' => '', 'classes' => array ( 0 => '', ), 'xfn' => '', 'submenu_items' => array ( ), 'current_page' => false, )), 1 => \WP_Post::__set_state(array( 'ID' => 46393, 'post_author' => '3', 'post_date' => '2024-12-03 15:48:20', 'post_date_gmt' => '2024-12-02 23:04:59', 'post_content' => ' ', 'post_title' => '', 'post_excerpt' => '', 'post_status' => 'publish', 'comment_status' => 'closed', 'ping_status' => 'closed', 'post_password' => '', 'post_name' => '46393', 'to_ping' => '', 'pinged' => '', 'post_modified' => '2024-12-03 15:48:20', 'post_modified_gmt' => '2024-12-03 20:48:20', 'post_content_filtered' => '', 'post_parent' => 28, 'guid' => 'https://www.clay-king.com/?p=46393', 'menu_order' => 4, 'post_type' => 'nav_menu_item', 'post_mime_type' => '', 'comment_count' => '0', 'filter' => 'raw', 'db_id' => 46393, 'menu_item_parent' => '955', 'object_id' => '821', 'object' => 'product_cat', 'type' => 'taxonomy', 'type_label' => 'Category', 'url' => 'https://www.clay-king.com/product-category/glazes/low-fire/', 'title' => 'Low Fire', 'target' => '', 'attr_title' => '', 'description' => '', 'classes' => array ( 0 => '', ), 'xfn' => '', 'submenu_items' => array ( ), 'current_page' => false, )), 2 => \WP_Post::__set_state(array( 'ID' => 46392, 'post_author' => '3', 'post_date' => '2024-12-03 15:48:20', 'post_date_gmt' => '2024-12-02 23:04:59', 'post_content' => ' ', 'post_title' => '', 'post_excerpt' => '', 'post_status' => 'publish', 'comment_status' => 'closed', 'ping_status' => 'closed', 'post_password' => '', 'post_name' => '46392', 'to_ping' => '', 'pinged' => '', 'post_modified' => '2024-12-03 15:48:20', 'post_modified_gmt' => '2024-12-03 20:48:20', 'post_content_filtered' => '', 'post_parent' => 28, 'guid' => 'https://www.clay-king.com/?p=46392', 'menu_order' => 5, 'post_type' => 'nav_menu_item', 'post_mime_type' => '', 'comment_count' => '0', 'filter' => 'raw', 'db_id' => 46392, 'menu_item_parent' => '955', 'object_id' => '820', 'object' => 'product_cat', 'type' => 'taxonomy', 'type_label' => 'Category', 'url' => 'https://www.clay-king.com/product-category/glazes/mid-range/', 'title' => 'Mid Range', 'target' => '', 'attr_title' => '', 'description' => '', 'classes' => array ( 0 => '', ), 'xfn' => '', 'submenu_items' => array ( ), 'current_page' => false, )), 3 => \WP_Post::__set_state(array( 'ID' => 46394, 'post_author' => '3', 'post_date' => '2024-12-03 15:48:20', 'post_date_gmt' => '2024-12-02 23:04:59', 'post_content' => ' ', 'post_title' => '', 'post_excerpt' => '', 'post_status' => 'publish', 'comment_status' => 'closed', 'ping_status' => 'closed', 'post_password' => '', 'post_name' => '46394', 'to_ping' => '', 'pinged' => '', 'post_modified' => '2024-12-03 15:48:20', 'post_modified_gmt' => '2024-12-03 20:48:20', 'post_content_filtered' => '', 'post_parent' => 28, 'guid' => 'https://www.clay-king.com/?p=46394', 'menu_order' => 6, 'post_type' => 'nav_menu_item', 'post_mime_type' => '', 'comment_count' => '0', 'filter' => 'raw', 'db_id' => 46394, 'menu_item_parent' => '955', 'object_id' => '823', 'object' => 'product_cat', 'type' => 'taxonomy', 'type_label' => 'Category', 'url' => 'https://www.clay-king.com/product-category/glazes/high-fire/', 'title' => 'High Fire', 'target' => '', 'attr_title' => '', 'description' => '', 'classes' => array ( 0 => '', ), 'xfn' => '', 'submenu_items' => array ( ), 'current_page' => false, )), 4 => \WP_Post::__set_state(array( 'ID' => 46395, 'post_author' => '3', 'post_date' => '2024-12-03 15:48:20', 'post_date_gmt' => '2024-12-02 23:04:59', 'post_content' => ' ', 'post_title' => '', 'post_excerpt' => '', 'post_status' => 'publish', 'comment_status' => 'closed', 'ping_status' => 'closed', 'post_password' => '', 'post_name' => '46395', 'to_ping' => '', 'pinged' => '', 'post_modified' => '2024-12-03 15:48:20', 'post_modified_gmt' => '2024-12-03 20:48:20', 'post_content_filtered' => '', 'post_parent' => 28, 'guid' => 'https://www.clay-king.com/?p=46395', 'menu_order' => 7, 'post_type' => 'nav_menu_item', 'post_mime_type' => '', 'comment_count' => '0', 'filter' => 'raw', 'db_id' => 46395, 'menu_item_parent' => '955', 'object_id' => '825', 'object' => 'product_cat', 'type' => 'taxonomy', 'type_label' => 'Category', 'url' => 'https://www.clay-king.com/product-category/glazes/raku/', 'title' => 'Raku', 'target' => '', 'attr_title' => '', 'description' => '', 'classes' => array ( 0 => '', ), 'xfn' => '', 'submenu_items' => array ( ), 'current_page' => false, )), 5 => \WP_Post::__set_state(array( 'ID' => 46396, 'post_author' => '3', 'post_date' => '2024-12-03 15:48:20', 'post_date_gmt' => '2024-12-02 23:04:59', 'post_content' => ' ', 'post_title' => '', 'post_excerpt' => '', 'post_status' => 'publish', 'comment_status' => 'closed', 'ping_status' => 'closed', 'post_password' => '', 'post_name' => '46396', 'to_ping' => '', 'pinged' => '', 'post_modified' => '2024-12-03 15:48:20', 'post_modified_gmt' => '2024-12-03 20:48:20', 'post_content_filtered' => '', 'post_parent' => 28, 'guid' => 'https://www.clay-king.com/?p=46396', 'menu_order' => 8, 'post_type' => 'nav_menu_item', 'post_mime_type' => '', 'comment_count' => '0', 'filter' => 'raw', 'db_id' => 46396, 'menu_item_parent' => '955', 'object_id' => '826', 'object' => 'product_cat', 'type' => 'taxonomy', 'type_label' => 'Category', 'url' => 'https://www.clay-king.com/product-category/glazes/stains/', 'title' => 'Stains', 'target' => '', 'attr_title' => '', 'description' => '', 'classes' => array ( 0 => '', ), 'xfn' => '', 'submenu_items' => array ( ), 'current_page' => false, )), 6 => \WP_Post::__set_state(array( 'ID' => 46397, 'post_author' => '3', 'post_date' => '2024-12-03 15:48:20', 'post_date_gmt' => '2024-12-02 23:04:59', 'post_content' => ' ', 'post_title' => '', 'post_excerpt' => '', 'post_status' => 'publish', 'comment_status' => 'closed', 'ping_status' => 'closed', 'post_password' => '', 'post_name' => '46397', 'to_ping' => '', 'pinged' => '', 'post_modified' => '2024-12-03 15:48:20', 'post_modified_gmt' => '2024-12-03 20:48:20', 'post_content_filtered' => '', 'post_parent' => 28, 'guid' => 'https://www.clay-king.com/?p=46397', 'menu_order' => 9, 'post_type' => 'nav_menu_item', 'post_mime_type' => '', 'comment_count' => '0', 'filter' => 'raw', 'db_id' => 46397, 'menu_item_parent' => '955', 'object_id' => '822', 'object' => 'product_cat', 'type' => 'taxonomy', 'type_label' => 'Category', 'url' => 'https://www.clay-king.com/product-category/glazes/underglaze/', 'title' => 'Underglaze', 'target' => '', 'attr_title' => '', 'description' => '', 'classes' => array ( 0 => '', ), 'xfn' => '', 'submenu_items' => array ( ), 'current_page' => false, )), 7 => \WP_Post::__set_state(array( 'ID' => 46358, 'post_author' => '3', 'post_date' => '2024-12-03 15:48:20', 'post_date_gmt' => '2024-12-02 21:05:20', 'post_content' => ' ', 'post_title' => '', 'post_excerpt' => '', 'post_status' => 'publish', 'comment_status' => 'closed', 'ping_status' => 'closed', 'post_password' => '', 'post_name' => '46358', 'to_ping' => '', 'pinged' => '', 'post_modified' => '2024-12-03 15:48:20', 'post_modified_gmt' => '2024-12-03 20:48:20', 'post_content_filtered' => '', 'post_parent' => 28, 'guid' => 'https://www.clay-king.com/?p=46358', 'menu_order' => 10, 'post_type' => 'nav_menu_item', 'post_mime_type' => '', 'comment_count' => '0', 'filter' => 'raw', 'db_id' => 46358, 'menu_item_parent' => '955', 'object_id' => '767', 'object' => 'product_cat', 'type' => 'taxonomy', 'type_label' => 'Category', 'url' => 'https://www.clay-king.com/product-category/glazes/underglaze-transfers/', 'title' => 'Underglaze Transfers', 'target' => '', 'attr_title' => '', 'description' => '', 'classes' => array ( 0 => '', ), 'xfn' => '', 'submenu_items' => array ( ), 'current_page' => false, )), 8 => \WP_Post::__set_state(array( 'ID' => 46398, 'post_author' => '3', 'post_date' => '2024-12-03 15:48:20', 'post_date_gmt' => '2024-12-02 23:04:59', 'post_content' => ' ', 'post_title' => '', 'post_excerpt' => '', 'post_status' => 'publish', 'comment_status' => 'closed', 'ping_status' => 'closed', 'post_password' => '', 'post_name' => '46398', 'to_ping' => '', 'pinged' => '', 'post_modified' => '2024-12-03 15:48:20', 'post_modified_gmt' => '2024-12-03 20:48:20', 'post_content_filtered' => '', 'post_parent' => 28, 'guid' => 'https://www.clay-king.com/?p=46398', 'menu_order' => 11, 'post_type' => 'nav_menu_item', 'post_mime_type' => '', 'comment_count' => '0', 'filter' => 'raw', 'db_id' => 46398, 'menu_item_parent' => '955', 'object_id' => '824', 'object' => 'product_cat', 'type' => 'taxonomy', 'type_label' => 'Category', 'url' => 'https://www.clay-king.com/product-category/glazes/washes/', 'title' => 'Washes', 'target' => '', 'attr_title' => '', 'description' => '', 'classes' => array ( 0 => '', ), 'xfn' => '', 'submenu_items' => array ( ), 'current_page' => false, )), ), 'current_page' => false, )) Glazes
- \WP_Post::__set_state(array( 'ID' => 956, 'post_author' => '3', 'post_date' => '2024-12-03 15:48:20', 'post_date_gmt' => '2022-12-21 20:29:28', 'post_content' => ' ', 'post_title' => '', 'post_excerpt' => '', 'post_status' => 'publish', 'comment_status' => 'closed', 'ping_status' => 'closed', 'post_password' => '', 'post_name' => '956', 'to_ping' => '', 'pinged' => '', 'post_modified' => '2024-12-03 15:48:20', 'post_modified_gmt' => '2024-12-03 20:48:20', 'post_content_filtered' => '', 'post_parent' => 0, 'guid' => 'http://clay-king.local/?p=956', 'menu_order' => 12, 'post_type' => 'nav_menu_item', 'post_mime_type' => '', 'comment_count' => '0', 'filter' => 'raw', 'db_id' => 956, 'menu_item_parent' => '0', 'object_id' => '27', 'object' => 'product_cat', 'type' => 'taxonomy', 'type_label' => 'Category', 'url' => 'https://www.clay-king.com/product-category/pottery-tools/', 'title' => 'Pottery Tools', 'target' => '', 'attr_title' => '', 'description' => '', 'classes' => array ( 0 => '', ), 'xfn' => '', 'submenu_items' => array ( 0 => \WP_Post::__set_state(array( 'ID' => 958, 'post_author' => '3', 'post_date' => '2024-12-03 15:48:20', 'post_date_gmt' => '2022-12-21 20:29:28', 'post_content' => ' ', 'post_title' => '', 'post_excerpt' => '', 'post_status' => 'publish', 'comment_status' => 'closed', 'ping_status' => 'closed', 'post_password' => '', 'post_name' => '958', 'to_ping' => '', 'pinged' => '', 'post_modified' => '2024-12-03 15:48:20', 'post_modified_gmt' => '2024-12-03 20:48:20', 'post_content_filtered' => '', 'post_parent' => 27, 'guid' => 'http://clay-king.local/?p=958', 'menu_order' => 13, 'post_type' => 'nav_menu_item', 'post_mime_type' => '', 'comment_count' => '0', 'filter' => 'raw', 'db_id' => 958, 'menu_item_parent' => '956', 'object_id' => '44', 'object' => 'product_cat', 'type' => 'taxonomy', 'type_label' => 'Category', 'url' => 'https://www.clay-king.com/product-category/pottery-tools/cutting/', 'title' => 'Cutting', 'target' => '', 'attr_title' => '', 'description' => '', 'classes' => array ( 0 => '', ), 'xfn' => '', 'submenu_items' => array ( ), 'current_page' => false, )), 1 => \WP_Post::__set_state(array( 'ID' => 957, 'post_author' => '3', 'post_date' => '2024-12-03 15:48:20', 'post_date_gmt' => '2022-12-21 20:29:28', 'post_content' => ' ', 'post_title' => '', 'post_excerpt' => '', 'post_status' => 'publish', 'comment_status' => 'closed', 'ping_status' => 'closed', 'post_password' => '', 'post_name' => '957', 'to_ping' => '', 'pinged' => '', 'post_modified' => '2024-12-03 15:48:20', 'post_modified_gmt' => '2024-12-03 20:48:20', 'post_content_filtered' => '', 'post_parent' => 27, 'guid' => 'http://clay-king.local/?p=957', 'menu_order' => 14, 'post_type' => 'nav_menu_item', 'post_mime_type' => '', 'comment_count' => '0', 'filter' => 'raw', 'db_id' => 957, 'menu_item_parent' => '956', 'object_id' => '45', 'object' => 'product_cat', 'type' => 'taxonomy', 'type_label' => 'Category', 'url' => 'https://www.clay-king.com/product-category/pottery-tools/carving/', 'title' => 'Trimming & Carving', 'target' => '', 'attr_title' => '', 'description' => '', 'classes' => array ( 0 => '', ), 'xfn' => '', 'submenu_items' => array ( ), 'current_page' => false, )), 2 => \WP_Post::__set_state(array( 'ID' => 961, 'post_author' => '3', 'post_date' => '2024-12-03 15:48:20', 'post_date_gmt' => '2022-12-21 20:29:28', 'post_content' => ' ', 'post_title' => '', 'post_excerpt' => '', 'post_status' => 'publish', 'comment_status' => 'closed', 'ping_status' => 'closed', 'post_password' => '', 'post_name' => '961', 'to_ping' => '', 'pinged' => '', 'post_modified' => '2024-12-03 15:48:20', 'post_modified_gmt' => '2024-12-03 20:48:20', 'post_content_filtered' => '', 'post_parent' => 27, 'guid' => 'http://clay-king.local/?p=961', 'menu_order' => 15, 'post_type' => 'nav_menu_item', 'post_mime_type' => '', 'comment_count' => '0', 'filter' => 'raw', 'db_id' => 961, 'menu_item_parent' => '956', 'object_id' => '47', 'object' => 'product_cat', 'type' => 'taxonomy', 'type_label' => 'Category', 'url' => 'https://www.clay-king.com/product-category/pottery-tools/molds/', 'title' => 'Molds', 'target' => '', 'attr_title' => '', 'description' => '', 'classes' => array ( 0 => '', ), 'xfn' => '', 'submenu_items' => array ( ), 'current_page' => false, )), 3 => \WP_Post::__set_state(array( 'ID' => 967, 'post_author' => '3', 'post_date' => '2024-12-03 15:48:20', 'post_date_gmt' => '2022-12-21 20:29:28', 'post_content' => ' ', 'post_title' => '', 'post_excerpt' => '', 'post_status' => 'publish', 'comment_status' => 'closed', 'ping_status' => 'closed', 'post_password' => '', 'post_name' => '967', 'to_ping' => '', 'pinged' => '', 'post_modified' => '2024-12-03 15:48:20', 'post_modified_gmt' => '2024-12-03 20:48:20', 'post_content_filtered' => '', 'post_parent' => 27, 'guid' => 'http://clay-king.local/?p=967', 'menu_order' => 16, 'post_type' => 'nav_menu_item', 'post_mime_type' => '', 'comment_count' => '0', 'filter' => 'raw', 'db_id' => 967, 'menu_item_parent' => '956', 'object_id' => '48', 'object' => 'product_cat', 'type' => 'taxonomy', 'type_label' => 'Category', 'url' => 'https://www.clay-king.com/product-category/pottery-tools/surface-decoration/textures/', 'title' => 'Textures', 'target' => '', 'attr_title' => '', 'description' => '', 'classes' => array ( 0 => '', ), 'xfn' => '', 'submenu_items' => array ( ), 'current_page' => false, )), 4 => \WP_Post::__set_state(array( 'ID' => 966, 'post_author' => '3', 'post_date' => '2024-12-03 15:48:20', 'post_date_gmt' => '2022-12-21 20:29:28', 'post_content' => ' ', 'post_title' => '', 'post_excerpt' => '', 'post_status' => 'publish', 'comment_status' => 'closed', 'ping_status' => 'closed', 'post_password' => '', 'post_name' => '966', 'to_ping' => '', 'pinged' => '', 'post_modified' => '2024-12-03 15:48:20', 'post_modified_gmt' => '2024-12-03 20:48:20', 'post_content_filtered' => '', 'post_parent' => 27, 'guid' => 'http://clay-king.local/?p=966', 'menu_order' => 17, 'post_type' => 'nav_menu_item', 'post_mime_type' => '', 'comment_count' => '0', 'filter' => 'raw', 'db_id' => 966, 'menu_item_parent' => '956', 'object_id' => '50', 'object' => 'product_cat', 'type' => 'taxonomy', 'type_label' => 'Category', 'url' => 'https://www.clay-king.com/product-category/pottery-tools/surface-decoration/stamps/', 'title' => 'Stamps', 'target' => '', 'attr_title' => '', 'description' => '', 'classes' => array ( 0 => '', ), 'xfn' => '', 'submenu_items' => array ( ), 'current_page' => false, )), 5 => \WP_Post::__set_state(array( 'ID' => 965, 'post_author' => '3', 'post_date' => '2024-12-03 15:48:20', 'post_date_gmt' => '2022-12-21 20:29:28', 'post_content' => ' ', 'post_title' => '', 'post_excerpt' => '', 'post_status' => 'publish', 'comment_status' => 'closed', 'ping_status' => 'closed', 'post_password' => '', 'post_name' => '965', 'to_ping' => '', 'pinged' => '', 'post_modified' => '2024-12-03 15:48:20', 'post_modified_gmt' => '2024-12-03 20:48:20', 'post_content_filtered' => '', 'post_parent' => 27, 'guid' => 'http://clay-king.local/?p=965', 'menu_order' => 18, 'post_type' => 'nav_menu_item', 'post_mime_type' => '', 'comment_count' => '0', 'filter' => 'raw', 'db_id' => 965, 'menu_item_parent' => '956', 'object_id' => '51', 'object' => 'product_cat', 'type' => 'taxonomy', 'type_label' => 'Category', 'url' => 'https://www.clay-king.com/product-category/pottery-tools/surface-decoration/rollers/', 'title' => 'Rollers', 'target' => '', 'attr_title' => '', 'description' => '', 'classes' => array ( 0 => '', ), 'xfn' => '', 'submenu_items' => array ( ), 'current_page' => false, )), 6 => \WP_Post::__set_state(array( 'ID' => 959, 'post_author' => '3', 'post_date' => '2024-12-03 15:48:20', 'post_date_gmt' => '2022-12-21 20:29:28', 'post_content' => ' ', 'post_title' => '', 'post_excerpt' => '', 'post_status' => 'publish', 'comment_status' => 'closed', 'ping_status' => 'closed', 'post_password' => '', 'post_name' => '959', 'to_ping' => '', 'pinged' => '', 'post_modified' => '2024-12-03 15:48:20', 'post_modified_gmt' => '2024-12-03 20:48:20', 'post_content_filtered' => '', 'post_parent' => 27, 'guid' => 'http://clay-king.local/?p=959', 'menu_order' => 19, 'post_type' => 'nav_menu_item', 'post_mime_type' => '', 'comment_count' => '0', 'filter' => 'raw', 'db_id' => 959, 'menu_item_parent' => '956', 'object_id' => '53', 'object' => 'product_cat', 'type' => 'taxonomy', 'type_label' => 'Category', 'url' => 'https://www.clay-king.com/product-category/pottery-tools/finishing-sanding/', 'title' => 'Finishing & Sanding', 'target' => '', 'attr_title' => '', 'description' => '', 'classes' => array ( 0 => '', ), 'xfn' => '', 'submenu_items' => array ( ), 'current_page' => false, )), 7 => \WP_Post::__set_state(array( 'ID' => 962, 'post_author' => '3', 'post_date' => '2024-12-03 15:48:20', 'post_date_gmt' => '2022-12-21 20:29:28', 'post_content' => ' ', 'post_title' => '', 'post_excerpt' => '', 'post_status' => 'publish', 'comment_status' => 'closed', 'ping_status' => 'closed', 'post_password' => '', 'post_name' => '962', 'to_ping' => '', 'pinged' => '', 'post_modified' => '2024-12-03 15:48:20', 'post_modified_gmt' => '2024-12-03 20:48:20', 'post_content_filtered' => '', 'post_parent' => 27, 'guid' => 'http://clay-king.local/?p=962', 'menu_order' => 20, 'post_type' => 'nav_menu_item', 'post_mime_type' => '', 'comment_count' => '0', 'filter' => 'raw', 'db_id' => 962, 'menu_item_parent' => '956', 'object_id' => '55', 'object' => 'product_cat', 'type' => 'taxonomy', 'type_label' => 'Category', 'url' => 'https://www.clay-king.com/product-category/pottery-tools/other-pottery-tools/', 'title' => 'Other', 'target' => '', 'attr_title' => '', 'description' => '', 'classes' => array ( 0 => '', ), 'xfn' => '', 'submenu_items' => array ( ), 'current_page' => false, )), 8 => \WP_Post::__set_state(array( 'ID' => 40520, 'post_author' => '3', 'post_date' => '2024-12-03 15:48:20', 'post_date_gmt' => '2024-08-13 15:34:02', 'post_content' => ' ', 'post_title' => '', 'post_excerpt' => '', 'post_status' => 'publish', 'comment_status' => 'closed', 'ping_status' => 'closed', 'post_password' => '', 'post_name' => '40520', 'to_ping' => '', 'pinged' => '', 'post_modified' => '2024-12-03 15:48:20', 'post_modified_gmt' => '2024-12-03 20:48:20', 'post_content_filtered' => '', 'post_parent' => 26, 'guid' => 'https://clay-king.local/?p=40520', 'menu_order' => 21, 'post_type' => 'nav_menu_item', 'post_mime_type' => '', 'comment_count' => '0', 'filter' => 'raw', 'db_id' => 40520, 'menu_item_parent' => '956', 'object_id' => '488', 'object' => 'product_cat', 'type' => 'taxonomy', 'type_label' => 'Category', 'url' => 'https://www.clay-king.com/product-category/accessories/other-equipment-accessories/', 'title' => 'Other Equipment', 'target' => '', 'attr_title' => '', 'description' => '', 'classes' => array ( 0 => '', ), 'xfn' => '', 'submenu_items' => array ( ), 'current_page' => false, )), ), 'current_page' => false, )) Pottery Tools
- \WP_Post::__set_state(array( 'ID' => 45878, 'post_author' => '3', 'post_date' => '2024-12-03 15:48:20', 'post_date_gmt' => '2024-11-21 19:33:18', 'post_content' => ' ', 'post_title' => '', 'post_excerpt' => '', 'post_status' => 'publish', 'comment_status' => 'closed', 'ping_status' => 'closed', 'post_password' => '', 'post_name' => '45878', 'to_ping' => '', 'pinged' => '', 'post_modified' => '2024-12-03 15:48:20', 'post_modified_gmt' => '2024-12-03 20:48:20', 'post_content_filtered' => '', 'post_parent' => 0, 'guid' => 'https://www.clay-king.com/?p=45878', 'menu_order' => 22, 'post_type' => 'nav_menu_item', 'post_mime_type' => '', 'comment_count' => '0', 'filter' => 'raw', 'db_id' => 45878, 'menu_item_parent' => '0', 'object_id' => '778', 'object' => 'product_cat', 'type' => 'taxonomy', 'type_label' => 'Category', 'url' => 'https://www.clay-king.com/product-category/pottery-tools/wholesale-pottery-tools/', 'title' => 'Wholesale Pottery Tools', 'target' => '', 'attr_title' => '', 'description' => '', 'classes' => array ( 0 => '', ), 'xfn' => '', 'submenu_items' => array ( ), 'current_page' => false, )) Wholesale Pottery Tools
- \WP_Post::__set_state(array( 'ID' => 979, 'post_author' => '3', 'post_date' => '2024-12-03 15:48:20', 'post_date_gmt' => '2022-12-21 20:30:51', 'post_content' => ' ', 'post_title' => '', 'post_excerpt' => '', 'post_status' => 'publish', 'comment_status' => 'closed', 'ping_status' => 'closed', 'post_password' => '', 'post_name' => '979', 'to_ping' => '', 'pinged' => '', 'post_modified' => '2024-12-03 15:48:20', 'post_modified_gmt' => '2024-12-03 20:48:20', 'post_content_filtered' => '', 'post_parent' => 0, 'guid' => 'http://clay-king.local/?p=979', 'menu_order' => 23, 'post_type' => 'nav_menu_item', 'post_mime_type' => '', 'comment_count' => '0', 'filter' => 'raw', 'db_id' => 979, 'menu_item_parent' => '0', 'object_id' => '24', 'object' => 'product_cat', 'type' => 'taxonomy', 'type_label' => 'Category', 'url' => 'https://www.clay-king.com/product-category/kilns/', 'title' => 'Kilns', 'target' => '', 'attr_title' => '', 'description' => '', 'classes' => array ( 0 => '', ), 'xfn' => '', 'submenu_items' => array ( 0 => \WP_Post::__set_state(array( 'ID' => 46466, 'post_author' => '3', 'post_date' => '2024-12-03 15:48:21', 'post_date_gmt' => '2024-12-03 20:48:21', 'post_content' => ' ', 'post_title' => '', 'post_excerpt' => '', 'post_status' => 'publish', 'comment_status' => 'closed', 'ping_status' => 'closed', 'post_password' => '', 'post_name' => '46466', 'to_ping' => '', 'pinged' => '', 'post_modified' => '2024-12-03 15:48:21', 'post_modified_gmt' => '2024-12-03 20:48:21', 'post_content_filtered' => '', 'post_parent' => 24, 'guid' => 'https://www.clay-king.com/?p=46466', 'menu_order' => 24, 'post_type' => 'nav_menu_item', 'post_mime_type' => '', 'comment_count' => '0', 'filter' => 'raw', 'db_id' => 46466, 'menu_item_parent' => '979', 'object_id' => '846', 'object' => 'product_cat', 'type' => 'taxonomy', 'type_label' => 'Category', 'url' => 'https://www.clay-king.com/product-category/kilns/ceramic-kilns/', 'title' => 'Ceramic Kilns', 'target' => '', 'attr_title' => '', 'description' => '', 'classes' => array ( 0 => '', ), 'xfn' => '', 'submenu_items' => array ( ), 'current_page' => false, )), 1 => \WP_Post::__set_state(array( 'ID' => 46467, 'post_author' => '3', 'post_date' => '2024-12-03 15:48:21', 'post_date_gmt' => '2024-12-03 20:48:21', 'post_content' => ' ', 'post_title' => '', 'post_excerpt' => '', 'post_status' => 'publish', 'comment_status' => 'closed', 'ping_status' => 'closed', 'post_password' => '', 'post_name' => '46467', 'to_ping' => '', 'pinged' => '', 'post_modified' => '2024-12-03 15:48:21', 'post_modified_gmt' => '2024-12-03 20:48:21', 'post_content_filtered' => '', 'post_parent' => 24, 'guid' => 'https://www.clay-king.com/?p=46467', 'menu_order' => 25, 'post_type' => 'nav_menu_item', 'post_mime_type' => '', 'comment_count' => '0', 'filter' => 'raw', 'db_id' => 46467, 'menu_item_parent' => '979', 'object_id' => '852', 'object' => 'product_cat', 'type' => 'taxonomy', 'type_label' => 'Category', 'url' => 'https://www.clay-king.com/product-category/kilns/glass-kilns/', 'title' => 'Glass Kilns', 'target' => '', 'attr_title' => '', 'description' => '', 'classes' => array ( 0 => '', ), 'xfn' => '', 'submenu_items' => array ( ), 'current_page' => false, )), 2 => \WP_Post::__set_state(array( 'ID' => 46468, 'post_author' => '3', 'post_date' => '2024-12-03 15:48:21', 'post_date_gmt' => '2024-12-03 20:48:21', 'post_content' => ' ', 'post_title' => '', 'post_excerpt' => '', 'post_status' => 'publish', 'comment_status' => 'closed', 'ping_status' => 'closed', 'post_password' => '', 'post_name' => '46468', 'to_ping' => '', 'pinged' => '', 'post_modified' => '2024-12-03 15:48:21', 'post_modified_gmt' => '2024-12-03 20:48:21', 'post_content_filtered' => '', 'post_parent' => 24, 'guid' => 'https://www.clay-king.com/?p=46468', 'menu_order' => 26, 'post_type' => 'nav_menu_item', 'post_mime_type' => '', 'comment_count' => '0', 'filter' => 'raw', 'db_id' => 46468, 'menu_item_parent' => '979', 'object_id' => '858', 'object' => 'product_cat', 'type' => 'taxonomy', 'type_label' => 'Category', 'url' => 'https://www.clay-king.com/product-category/kilns/knife/', 'title' => 'Knife Kilns', 'target' => '', 'attr_title' => '', 'description' => '', 'classes' => array ( 0 => '', ), 'xfn' => '', 'submenu_items' => array ( ), 'current_page' => false, )), ), 'current_page' => false, )) Kilns
- \WP_Post::__set_state(array( 'ID' => 980, 'post_author' => '3', 'post_date' => '2024-12-03 15:48:21', 'post_date_gmt' => '2022-12-21 20:30:51', 'post_content' => ' ', 'post_title' => '', 'post_excerpt' => '', 'post_status' => 'publish', 'comment_status' => 'closed', 'ping_status' => 'closed', 'post_password' => '', 'post_name' => '980', 'to_ping' => '', 'pinged' => '', 'post_modified' => '2024-12-03 15:48:21', 'post_modified_gmt' => '2024-12-03 20:48:21', 'post_content_filtered' => '', 'post_parent' => 0, 'guid' => 'http://clay-king.local/?p=980', 'menu_order' => 27, 'post_type' => 'nav_menu_item', 'post_mime_type' => '', 'comment_count' => '0', 'filter' => 'raw', 'db_id' => 980, 'menu_item_parent' => '0', 'object_id' => '25', 'object' => 'product_cat', 'type' => 'taxonomy', 'type_label' => 'Category', 'url' => 'https://www.clay-king.com/product-category/pottery-wheels/', 'title' => 'Pottery Wheels', 'target' => '', 'attr_title' => '', 'description' => '', 'classes' => array ( 0 => '', ), 'xfn' => '', 'submenu_items' => array ( ), 'current_page' => false, )) Pottery Wheels
- \WP_Post::__set_state(array( 'ID' => 947, 'post_author' => '3', 'post_date' => '2024-12-03 15:48:21', 'post_date_gmt' => '2022-12-21 20:26:38', 'post_content' => ' ', 'post_title' => '', 'post_excerpt' => '', 'post_status' => 'publish', 'comment_status' => 'closed', 'ping_status' => 'closed', 'post_password' => '', 'post_name' => '947', 'to_ping' => '', 'pinged' => '', 'post_modified' => '2024-12-03 15:48:21', 'post_modified_gmt' => '2024-12-03 20:48:21', 'post_content_filtered' => '', 'post_parent' => 0, 'guid' => 'http://clay-king.local/?p=947', 'menu_order' => 28, 'post_type' => 'nav_menu_item', 'post_mime_type' => '', 'comment_count' => '0', 'filter' => 'raw', 'db_id' => 947, 'menu_item_parent' => '0', 'object_id' => '29', 'object' => 'product_cat', 'type' => 'taxonomy', 'type_label' => 'Category', 'url' => 'https://www.clay-king.com/product-category/other-equipment/', 'title' => 'Other Equipment', 'target' => '', 'attr_title' => '', 'description' => '', 'classes' => array ( 0 => '', ), 'xfn' => '', 'submenu_items' => array ( 0 => \WP_Post::__set_state(array( 'ID' => 953, 'post_author' => '3', 'post_date' => '2024-12-03 15:48:21', 'post_date_gmt' => '2022-12-21 20:26:38', 'post_content' => ' ', 'post_title' => '', 'post_excerpt' => '', 'post_status' => 'publish', 'comment_status' => 'closed', 'ping_status' => 'closed', 'post_password' => '', 'post_name' => '953', 'to_ping' => '', 'pinged' => '', 'post_modified' => '2024-12-03 15:48:21', 'post_modified_gmt' => '2024-12-03 20:48:21', 'post_content_filtered' => '', 'post_parent' => 29, 'guid' => 'http://clay-king.local/?p=953', 'menu_order' => 29, 'post_type' => 'nav_menu_item', 'post_mime_type' => '', 'comment_count' => '0', 'filter' => 'raw', 'db_id' => 953, 'menu_item_parent' => '947', 'object_id' => '56', 'object' => 'product_cat', 'type' => 'taxonomy', 'type_label' => 'Category', 'url' => 'https://www.clay-king.com/product-category/other-equipment/slab-rollers/', 'title' => 'Slab Rollers', 'target' => '', 'attr_title' => '', 'description' => '', 'classes' => array ( 0 => '', ), 'xfn' => '', 'submenu_items' => array ( ), 'current_page' => false, )), 1 => \WP_Post::__set_state(array( 'ID' => 950, 'post_author' => '3', 'post_date' => '2024-12-03 15:48:21', 'post_date_gmt' => '2022-12-21 20:26:38', 'post_content' => ' ', 'post_title' => '', 'post_excerpt' => '', 'post_status' => 'publish', 'comment_status' => 'closed', 'ping_status' => 'closed', 'post_password' => '', 'post_name' => '950', 'to_ping' => '', 'pinged' => '', 'post_modified' => '2024-12-03 15:48:21', 'post_modified_gmt' => '2024-12-03 20:48:21', 'post_content_filtered' => '', 'post_parent' => 29, 'guid' => 'http://clay-king.local/?p=950', 'menu_order' => 30, 'post_type' => 'nav_menu_item', 'post_mime_type' => '', 'comment_count' => '0', 'filter' => 'raw', 'db_id' => 950, 'menu_item_parent' => '947', 'object_id' => '57', 'object' => 'product_cat', 'type' => 'taxonomy', 'type_label' => 'Category', 'url' => 'https://www.clay-king.com/product-category/other-equipment/clay-extruders/', 'title' => 'Clay Extruders', 'target' => '', 'attr_title' => '', 'description' => '', 'classes' => array ( 0 => '', ), 'xfn' => '', 'submenu_items' => array ( ), 'current_page' => false, )), 2 => \WP_Post::__set_state(array( 'ID' => 952, 'post_author' => '3', 'post_date' => '2024-12-03 15:48:21', 'post_date_gmt' => '2022-12-21 20:26:38', 'post_content' => ' ', 'post_title' => '', 'post_excerpt' => '', 'post_status' => 'publish', 'comment_status' => 'closed', 'ping_status' => 'closed', 'post_password' => '', 'post_name' => '952', 'to_ping' => '', 'pinged' => '', 'post_modified' => '2024-12-03 15:48:21', 'post_modified_gmt' => '2024-12-03 20:48:21', 'post_content_filtered' => '', 'post_parent' => 29, 'guid' => 'http://clay-king.local/?p=952', 'menu_order' => 31, 'post_type' => 'nav_menu_item', 'post_mime_type' => '', 'comment_count' => '0', 'filter' => 'raw', 'db_id' => 952, 'menu_item_parent' => '947', 'object_id' => '58', 'object' => 'product_cat', 'type' => 'taxonomy', 'type_label' => 'Category', 'url' => 'https://www.clay-king.com/product-category/other-equipment/pugmills/', 'title' => 'Pugmills', 'target' => '', 'attr_title' => '', 'description' => '', 'classes' => array ( 0 => '', ), 'xfn' => '', 'submenu_items' => array ( ), 'current_page' => false, )), 3 => \WP_Post::__set_state(array( 'ID' => 951, 'post_author' => '3', 'post_date' => '2024-12-03 15:48:21', 'post_date_gmt' => '2022-12-21 20:26:38', 'post_content' => ' ', 'post_title' => '', 'post_excerpt' => '', 'post_status' => 'publish', 'comment_status' => 'closed', 'ping_status' => 'closed', 'post_password' => '', 'post_name' => '951', 'to_ping' => '', 'pinged' => '', 'post_modified' => '2024-12-03 15:48:21', 'post_modified_gmt' => '2024-12-03 20:48:21', 'post_content_filtered' => '', 'post_parent' => 29, 'guid' => 'http://clay-king.local/?p=951', 'menu_order' => 32, 'post_type' => 'nav_menu_item', 'post_mime_type' => '', 'comment_count' => '0', 'filter' => 'raw', 'db_id' => 951, 'menu_item_parent' => '947', 'object_id' => '59', 'object' => 'product_cat', 'type' => 'taxonomy', 'type_label' => 'Category', 'url' => 'https://www.clay-king.com/product-category/other-equipment/mixers/', 'title' => 'Mixers', 'target' => '', 'attr_title' => '', 'description' => '', 'classes' => array ( 0 => '', ), 'xfn' => '', 'submenu_items' => array ( ), 'current_page' => false, )), 4 => \WP_Post::__set_state(array( 'ID' => 948, 'post_author' => '3', 'post_date' => '2024-12-03 15:48:21', 'post_date_gmt' => '2022-12-21 20:26:38', 'post_content' => ' ', 'post_title' => '', 'post_excerpt' => '', 'post_status' => 'publish', 'comment_status' => 'closed', 'ping_status' => 'closed', 'post_password' => '', 'post_name' => '948', 'to_ping' => '', 'pinged' => '', 'post_modified' => '2024-12-03 15:48:21', 'post_modified_gmt' => '2024-12-03 20:48:21', 'post_content_filtered' => '', 'post_parent' => 29, 'guid' => 'http://clay-king.local/?p=948', 'menu_order' => 33, 'post_type' => 'nav_menu_item', 'post_mime_type' => '', 'comment_count' => '0', 'filter' => 'raw', 'db_id' => 948, 'menu_item_parent' => '947', 'object_id' => '60', 'object' => 'product_cat', 'type' => 'taxonomy', 'type_label' => 'Category', 'url' => 'https://www.clay-king.com/product-category/other-equipment/3d-ceramic-printers/', 'title' => '3D Ceramic Printers', 'target' => '', 'attr_title' => '', 'description' => '', 'classes' => array ( 0 => '', ), 'xfn' => '', 'submenu_items' => array ( ), 'current_page' => false, )), 5 => \WP_Post::__set_state(array( 'ID' => 949, 'post_author' => '3', 'post_date' => '2024-12-03 15:48:21', 'post_date_gmt' => '2022-12-21 20:26:38', 'post_content' => ' ', 'post_title' => '', 'post_excerpt' => '', 'post_status' => 'publish', 'comment_status' => 'closed', 'ping_status' => 'closed', 'post_password' => '', 'post_name' => '949', 'to_ping' => '', 'pinged' => '', 'post_modified' => '2024-12-03 15:48:21', 'post_modified_gmt' => '2024-12-03 20:48:21', 'post_content_filtered' => '', 'post_parent' => 29, 'guid' => 'http://clay-king.local/?p=949', 'menu_order' => 34, 'post_type' => 'nav_menu_item', 'post_mime_type' => '', 'comment_count' => '0', 'filter' => 'raw', 'db_id' => 949, 'menu_item_parent' => '947', 'object_id' => '61', 'object' => 'product_cat', 'type' => 'taxonomy', 'type_label' => 'Category', 'url' => 'https://www.clay-king.com/product-category/other-equipment/airbrushes-equipment/', 'title' => 'Airbrushes & Equipment', 'target' => '', 'attr_title' => '', 'description' => '', 'classes' => array ( 0 => '', ), 'xfn' => '', 'submenu_items' => array ( ), 'current_page' => false, )), 6 => \WP_Post::__set_state(array( 'ID' => 954, 'post_author' => '3', 'post_date' => '2024-12-03 15:48:21', 'post_date_gmt' => '2022-12-21 20:26:38', 'post_content' => ' ', 'post_title' => '', 'post_excerpt' => '', 'post_status' => 'publish', 'comment_status' => 'closed', 'ping_status' => 'closed', 'post_password' => '', 'post_name' => '954', 'to_ping' => '', 'pinged' => '', 'post_modified' => '2024-12-03 15:48:21', 'post_modified_gmt' => '2024-12-03 20:48:21', 'post_content_filtered' => '', 'post_parent' => 29, 'guid' => 'http://clay-king.local/?p=954', 'menu_order' => 35, 'post_type' => 'nav_menu_item', 'post_mime_type' => '', 'comment_count' => '0', 'filter' => 'raw', 'db_id' => 954, 'menu_item_parent' => '947', 'object_id' => '62', 'object' => 'product_cat', 'type' => 'taxonomy', 'type_label' => 'Category', 'url' => 'https://www.clay-king.com/product-category/other-equipment/tables-carts/', 'title' => 'Tables & Carts', 'target' => '', 'attr_title' => '', 'description' => '', 'classes' => array ( 0 => '', ), 'xfn' => '', 'submenu_items' => array ( ), 'current_page' => false, )), ), 'current_page' => false, )) Other Equipment
- \WP_Post::__set_state(array( 'ID' => 969, 'post_author' => '3', 'post_date' => '2024-12-03 15:48:21', 'post_date_gmt' => '2022-12-21 20:29:28', 'post_content' => ' ', 'post_title' => '', 'post_excerpt' => '', 'post_status' => 'publish', 'comment_status' => 'closed', 'ping_status' => 'closed', 'post_password' => '', 'post_name' => '969', 'to_ping' => '', 'pinged' => '', 'post_modified' => '2024-12-03 15:48:21', 'post_modified_gmt' => '2024-12-03 20:48:21', 'post_content_filtered' => '', 'post_parent' => 0, 'guid' => 'http://clay-king.local/?p=969', 'menu_order' => 36, 'post_type' => 'nav_menu_item', 'post_mime_type' => '', 'comment_count' => '0', 'filter' => 'raw', 'db_id' => 969, 'menu_item_parent' => '0', 'object_id' => '26', 'object' => 'product_cat', 'type' => 'taxonomy', 'type_label' => 'Category', 'url' => 'https://www.clay-king.com/product-category/accessories/', 'title' => 'Accessories', 'target' => '', 'attr_title' => '', 'description' => '', 'classes' => array ( 0 => '', ), 'xfn' => '', 'submenu_items' => array ( 0 => \WP_Post::__set_state(array( 'ID' => 40517, 'post_author' => '3', 'post_date' => '2024-12-03 15:48:21', 'post_date_gmt' => '2024-08-13 15:34:01', 'post_content' => ' ', 'post_title' => '', 'post_excerpt' => '', 'post_status' => 'publish', 'comment_status' => 'closed', 'ping_status' => 'closed', 'post_password' => '', 'post_name' => '40517', 'to_ping' => '', 'pinged' => '', 'post_modified' => '2024-12-03 15:48:21', 'post_modified_gmt' => '2024-12-03 20:48:21', 'post_content_filtered' => '', 'post_parent' => 26, 'guid' => 'https://clay-king.local/?p=40517', 'menu_order' => 37, 'post_type' => 'nav_menu_item', 'post_mime_type' => '', 'comment_count' => '0', 'filter' => 'raw', 'db_id' => 40517, 'menu_item_parent' => '969', 'object_id' => '486', 'object' => 'product_cat', 'type' => 'taxonomy', 'type_label' => 'Category', 'url' => 'https://www.clay-king.com/product-category/accessories/glaze/', 'title' => 'Glaze', 'target' => '', 'attr_title' => '', 'description' => '', 'classes' => array ( 0 => '', ), 'xfn' => '', 'submenu_items' => array ( ), 'current_page' => false, )), 1 => \WP_Post::__set_state(array( 'ID' => 40516, 'post_author' => '3', 'post_date' => '2024-12-03 15:48:21', 'post_date_gmt' => '2024-08-13 15:34:01', 'post_content' => ' ', 'post_title' => '', 'post_excerpt' => '', 'post_status' => 'publish', 'comment_status' => 'closed', 'ping_status' => 'closed', 'post_password' => '', 'post_name' => '40516', 'to_ping' => '', 'pinged' => '', 'post_modified' => '2024-12-03 15:48:21', 'post_modified_gmt' => '2024-12-03 20:48:21', 'post_content_filtered' => '', 'post_parent' => 26, 'guid' => 'https://clay-king.local/?p=40516', 'menu_order' => 38, 'post_type' => 'nav_menu_item', 'post_mime_type' => '', 'comment_count' => '0', 'filter' => 'raw', 'db_id' => 40516, 'menu_item_parent' => '969', 'object_id' => '485', 'object' => 'product_cat', 'type' => 'taxonomy', 'type_label' => 'Category', 'url' => 'https://www.clay-king.com/product-category/accessories/clay-accessories/', 'title' => 'Clay', 'target' => '', 'attr_title' => '', 'description' => '', 'classes' => array ( 0 => '', ), 'xfn' => '', 'submenu_items' => array ( ), 'current_page' => false, )), 2 => \WP_Post::__set_state(array( 'ID' => 40518, 'post_author' => '3', 'post_date' => '2024-12-03 15:48:21', 'post_date_gmt' => '2024-08-13 15:34:01', 'post_content' => ' ', 'post_title' => '', 'post_excerpt' => '', 'post_status' => 'publish', 'comment_status' => 'closed', 'ping_status' => 'closed', 'post_password' => '', 'post_name' => '40518', 'to_ping' => '', 'pinged' => '', 'post_modified' => '2024-12-03 15:48:21', 'post_modified_gmt' => '2024-12-03 20:48:21', 'post_content_filtered' => '', 'post_parent' => 26, 'guid' => 'https://clay-king.local/?p=40518', 'menu_order' => 39, 'post_type' => 'nav_menu_item', 'post_mime_type' => '', 'comment_count' => '0', 'filter' => 'raw', 'db_id' => 40518, 'menu_item_parent' => '969', 'object_id' => '484', 'object' => 'product_cat', 'type' => 'taxonomy', 'type_label' => 'Category', 'url' => 'https://www.clay-king.com/product-category/accessories/kiln-accessories/', 'title' => 'Kiln Accessories', 'target' => '', 'attr_title' => '', 'description' => '', 'classes' => array ( 0 => '', ), 'xfn' => '', 'submenu_items' => array ( ), 'current_page' => false, )), 3 => \WP_Post::__set_state(array( 'ID' => 40521, 'post_author' => '3', 'post_date' => '2024-12-03 15:48:21', 'post_date_gmt' => '2024-08-13 15:34:01', 'post_content' => ' ', 'post_title' => '', 'post_excerpt' => '', 'post_status' => 'publish', 'comment_status' => 'closed', 'ping_status' => 'closed', 'post_password' => '', 'post_name' => '40521', 'to_ping' => '', 'pinged' => '', 'post_modified' => '2024-12-03 15:48:21', 'post_modified_gmt' => '2024-12-03 20:48:21', 'post_content_filtered' => '', 'post_parent' => 26, 'guid' => 'https://clay-king.local/?p=40521', 'menu_order' => 40, 'post_type' => 'nav_menu_item', 'post_mime_type' => '', 'comment_count' => '0', 'filter' => 'raw', 'db_id' => 40521, 'menu_item_parent' => '969', 'object_id' => '483', 'object' => 'product_cat', 'type' => 'taxonomy', 'type_label' => 'Category', 'url' => 'https://www.clay-king.com/product-category/accessories/wheel/', 'title' => 'Wheel Accessories', 'target' => '', 'attr_title' => '', 'description' => '', 'classes' => array ( 0 => '', ), 'xfn' => '', 'submenu_items' => array ( ), 'current_page' => false, )), 4 => \WP_Post::__set_state(array( 'ID' => 40531, 'post_author' => '3', 'post_date' => '2024-12-03 15:48:21', 'post_date_gmt' => '2024-08-13 15:34:47', 'post_content' => ' ', 'post_title' => '', 'post_excerpt' => '', 'post_status' => 'publish', 'comment_status' => 'closed', 'ping_status' => 'closed', 'post_password' => '', 'post_name' => '40531', 'to_ping' => '', 'pinged' => '', 'post_modified' => '2024-12-03 15:48:21', 'post_modified_gmt' => '2024-12-03 20:48:21', 'post_content_filtered' => '', 'post_parent' => 26, 'guid' => 'https://clay-king.local/?p=40531', 'menu_order' => 41, 'post_type' => 'nav_menu_item', 'post_mime_type' => '', 'comment_count' => '0', 'filter' => 'raw', 'db_id' => 40531, 'menu_item_parent' => '969', 'object_id' => '488', 'object' => 'product_cat', 'type' => 'taxonomy', 'type_label' => 'Category', 'url' => 'https://www.clay-king.com/product-category/accessories/other-equipment-accessories/', 'title' => 'Other Equipment', 'target' => '', 'attr_title' => '', 'description' => '', 'classes' => array ( 0 => '', ), 'xfn' => '', 'submenu_items' => array ( ), 'current_page' => false, )), ), 'current_page' => false, )) Accessories
- \WP_Post::__set_state(array( 'ID' => 981, 'post_author' => '3', 'post_date' => '2024-12-03 15:48:21', 'post_date_gmt' => '2022-12-21 20:30:52', 'post_content' => ' ', 'post_title' => '', 'post_excerpt' => '', 'post_status' => 'publish', 'comment_status' => 'closed', 'ping_status' => 'closed', 'post_password' => '', 'post_name' => '981', 'to_ping' => '', 'pinged' => '', 'post_modified' => '2024-12-03 15:48:21', 'post_modified_gmt' => '2024-12-03 20:48:21', 'post_content_filtered' => '', 'post_parent' => 0, 'guid' => 'http://clay-king.local/?p=981', 'menu_order' => 42, 'post_type' => 'nav_menu_item', 'post_mime_type' => '', 'comment_count' => '0', 'filter' => 'raw', 'db_id' => 981, 'menu_item_parent' => '0', 'object_id' => '31', 'object' => 'product_cat', 'type' => 'taxonomy', 'type_label' => 'Category', 'url' => 'https://www.clay-king.com/product-category/instructional/', 'title' => 'Instructional', 'target' => '', 'attr_title' => '', 'description' => '', 'classes' => array ( 0 => '', ), 'xfn' => '', 'submenu_items' => array ( ), 'current_page' => false, )) Instructional
- \WP_Post::__set_state(array( 'ID' => 40553, 'post_author' => '3', 'post_date' => '2024-12-03 15:48:21', 'post_date_gmt' => '2024-08-14 19:33:43', 'post_content' => 'For our local potters in Upstate South Carolina, Clay-King hosts regular classes and workshops to hone your skills!', 'post_title' => '', 'post_excerpt' => '', 'post_status' => 'publish', 'comment_status' => 'closed', 'ping_status' => 'closed', 'post_password' => '', 'post_name' => '40553', 'to_ping' => '', 'pinged' => '', 'post_modified' => '2024-12-03 15:48:21', 'post_modified_gmt' => '2024-12-03 20:48:21', 'post_content_filtered' => '', 'post_parent' => 0, 'guid' => 'https://clay-king.local/?p=40553', 'menu_order' => 43, 'post_type' => 'nav_menu_item', 'post_mime_type' => '', 'comment_count' => '0', 'filter' => 'raw', 'db_id' => 40553, 'menu_item_parent' => '0', 'object_id' => '654', 'object' => 'product_cat', 'type' => 'taxonomy', 'type_label' => 'Category', 'url' => 'https://www.clay-king.com/product-category/classes/', 'title' => 'Classes', 'target' => '', 'attr_title' => '', 'description' => 'For our local potters in Upstate South Carolina, Clay-King hosts regular classes and workshops to hone your skills!', 'classes' => array ( 0 => '', ), 'xfn' => '', 'submenu_items' => array ( ), 'current_page' => false, )) Classes
- \WP_Post::__set_state(array( 'ID' => 942, 'post_author' => '3', 'post_date' => '2024-12-03 15:48:21', 'post_date_gmt' => '2022-12-21 20:26:38', 'post_content' => ' ', 'post_title' => '', 'post_excerpt' => '', 'post_status' => 'publish', 'comment_status' => 'closed', 'ping_status' => 'closed', 'post_password' => '', 'post_name' => '942', 'to_ping' => '', 'pinged' => '', 'post_modified' => '2024-12-03 15:48:21', 'post_modified_gmt' => '2024-12-03 20:48:21', 'post_content_filtered' => '', 'post_parent' => 0, 'guid' => 'http://clay-king.local/?p=942', 'menu_order' => 44, 'post_type' => 'nav_menu_item', 'post_mime_type' => '', 'comment_count' => '0', 'filter' => 'raw', 'db_id' => 942, 'menu_item_parent' => '0', 'object_id' => '30', 'object' => 'product_cat', 'type' => 'taxonomy', 'type_label' => 'Category', 'url' => 'https://www.clay-king.com/product-category/slip-casting/', 'title' => 'Slip Casting', 'target' => '', 'attr_title' => '', 'description' => '', 'classes' => array ( 0 => '', ), 'xfn' => '', 'submenu_items' => array ( 0 => \WP_Post::__set_state(array( 'ID' => 945, 'post_author' => '3', 'post_date' => '2024-12-03 15:48:21', 'post_date_gmt' => '2022-12-21 20:26:38', 'post_content' => ' ', 'post_title' => '', 'post_excerpt' => '', 'post_status' => 'publish', 'comment_status' => 'closed', 'ping_status' => 'closed', 'post_password' => '', 'post_name' => '945', 'to_ping' => '', 'pinged' => '', 'post_modified' => '2024-12-03 15:48:21', 'post_modified_gmt' => '2024-12-03 20:48:21', 'post_content_filtered' => '', 'post_parent' => 30, 'guid' => 'http://clay-king.local/?p=945', 'menu_order' => 45, 'post_type' => 'nav_menu_item', 'post_mime_type' => '', 'comment_count' => '0', 'filter' => 'raw', 'db_id' => 945, 'menu_item_parent' => '942', 'object_id' => '64', 'object' => 'product_cat', 'type' => 'taxonomy', 'type_label' => 'Category', 'url' => 'https://www.clay-king.com/product-category/slip-casting/cottle-boards/', 'title' => 'Cottle Boards', 'target' => '', 'attr_title' => '', 'description' => '', 'classes' => array ( 0 => '', ), 'xfn' => '', 'submenu_items' => array ( ), 'current_page' => false, )), 1 => \WP_Post::__set_state(array( 'ID' => 944, 'post_author' => '3', 'post_date' => '2024-12-03 15:48:21', 'post_date_gmt' => '2022-12-21 20:26:38', 'post_content' => ' ', 'post_title' => '', 'post_excerpt' => '', 'post_status' => 'publish', 'comment_status' => 'closed', 'ping_status' => 'closed', 'post_password' => '', 'post_name' => '944', 'to_ping' => '', 'pinged' => '', 'post_modified' => '2024-12-03 15:48:21', 'post_modified_gmt' => '2024-12-03 20:48:21', 'post_content_filtered' => '', 'post_parent' => 30, 'guid' => 'http://clay-king.local/?p=944', 'menu_order' => 46, 'post_type' => 'nav_menu_item', 'post_mime_type' => '', 'comment_count' => '0', 'filter' => 'raw', 'db_id' => 944, 'menu_item_parent' => '942', 'object_id' => '63', 'object' => 'product_cat', 'type' => 'taxonomy', 'type_label' => 'Category', 'url' => 'https://www.clay-king.com/product-category/slip-casting/slip-casting-equipment/', 'title' => 'Slip Casting Equipment', 'target' => '', 'attr_title' => '', 'description' => '', 'classes' => array ( 0 => '', ), 'xfn' => '', 'submenu_items' => array ( ), 'current_page' => false, )), 2 => \WP_Post::__set_state(array( 'ID' => 943, 'post_author' => '3', 'post_date' => '2024-12-03 15:48:21', 'post_date_gmt' => '2022-12-21 20:26:38', 'post_content' => ' ', 'post_title' => '', 'post_excerpt' => '', 'post_status' => 'publish', 'comment_status' => 'closed', 'ping_status' => 'closed', 'post_password' => '', 'post_name' => '943', 'to_ping' => '', 'pinged' => '', 'post_modified' => '2024-12-03 15:48:21', 'post_modified_gmt' => '2024-12-03 20:48:21', 'post_content_filtered' => '', 'post_parent' => 30, 'guid' => 'http://clay-king.local/?p=943', 'menu_order' => 47, 'post_type' => 'nav_menu_item', 'post_mime_type' => '', 'comment_count' => '0', 'filter' => 'raw', 'db_id' => 943, 'menu_item_parent' => '942', 'object_id' => '66', 'object' => 'product_cat', 'type' => 'taxonomy', 'type_label' => 'Category', 'url' => 'https://www.clay-king.com/product-category/slip-casting/slip-casting-accessories/', 'title' => 'Slip Casting Accessories', 'target' => '', 'attr_title' => '', 'description' => '', 'classes' => array ( 0 => '', ), 'xfn' => '', 'submenu_items' => array ( ), 'current_page' => false, )), ), 'current_page' => false, )) Slip Casting
- \WP_Post::__set_state(array( 'ID' => 977, 'post_author' => '3', 'post_date' => '2024-12-03 15:48:21', 'post_date_gmt' => '2022-12-21 20:30:51', 'post_content' => ' ', 'post_title' => '', 'post_excerpt' => '', 'post_status' => 'publish', 'comment_status' => 'closed', 'ping_status' => 'closed', 'post_password' => '', 'post_name' => '977', 'to_ping' => '', 'pinged' => '', 'post_modified' => '2024-12-03 15:48:21', 'post_modified_gmt' => '2024-12-03 20:48:21', 'post_content_filtered' => '', 'post_parent' => 0, 'guid' => 'http://clay-king.local/?p=977', 'menu_order' => 48, 'post_type' => 'nav_menu_item', 'post_mime_type' => '', 'comment_count' => '0', 'filter' => 'raw', 'db_id' => 977, 'menu_item_parent' => '0', 'object_id' => '22', 'object' => 'product_cat', 'type' => 'taxonomy', 'type_label' => 'Category', 'url' => 'https://www.clay-king.com/product-category/bisqueware/', 'title' => 'Bisqueware', 'target' => '', 'attr_title' => '', 'description' => '', 'classes' => array ( 0 => '', ), 'xfn' => '', 'submenu_items' => array ( 0 => \WP_Post::__set_state(array( 'ID' => 40506, 'post_author' => '3', 'post_date' => '2024-12-03 15:48:21', 'post_date_gmt' => '2024-08-13 15:34:01', 'post_content' => ' ', 'post_title' => '', 'post_excerpt' => '', 'post_status' => 'publish', 'comment_status' => 'closed', 'ping_status' => 'closed', 'post_password' => '', 'post_name' => '40506', 'to_ping' => '', 'pinged' => '', 'post_modified' => '2024-12-03 15:48:21', 'post_modified_gmt' => '2024-12-03 20:48:21', 'post_content_filtered' => '', 'post_parent' => 22, 'guid' => 'https://clay-king.local/?p=40506', 'menu_order' => 49, 'post_type' => 'nav_menu_item', 'post_mime_type' => '', 'comment_count' => '0', 'filter' => 'raw', 'db_id' => 40506, 'menu_item_parent' => '977', 'object_id' => '400', 'object' => 'product_cat', 'type' => 'taxonomy', 'type_label' => 'Category', 'url' => 'https://www.clay-king.com/product-category/bisqueware/animals/', 'title' => 'Animals', 'target' => '', 'attr_title' => '', 'description' => '', 'classes' => array ( 0 => '', ), 'xfn' => '', 'submenu_items' => array ( ), 'current_page' => false, )), 1 => \WP_Post::__set_state(array( 'ID' => 40507, 'post_author' => '3', 'post_date' => '2024-12-03 15:48:21', 'post_date_gmt' => '2024-08-13 15:34:01', 'post_content' => ' ', 'post_title' => '', 'post_excerpt' => '', 'post_status' => 'publish', 'comment_status' => 'closed', 'ping_status' => 'closed', 'post_password' => '', 'post_name' => '40507', 'to_ping' => '', 'pinged' => '', 'post_modified' => '2024-12-03 15:48:21', 'post_modified_gmt' => '2024-12-03 20:48:21', 'post_content_filtered' => '', 'post_parent' => 22, 'guid' => 'https://clay-king.local/?p=40507', 'menu_order' => 50, 'post_type' => 'nav_menu_item', 'post_mime_type' => '', 'comment_count' => '0', 'filter' => 'raw', 'db_id' => 40507, 'menu_item_parent' => '977', 'object_id' => '401', 'object' => 'product_cat', 'type' => 'taxonomy', 'type_label' => 'Category', 'url' => 'https://www.clay-king.com/product-category/bisqueware/banks-boxes/', 'title' => 'Banks & Boxes', 'target' => '', 'attr_title' => '', 'description' => '', 'classes' => array ( 0 => '', ), 'xfn' => '', 'submenu_items' => array ( ), 'current_page' => false, )), 2 => \WP_Post::__set_state(array( 'ID' => 40508, 'post_author' => '3', 'post_date' => '2024-12-03 15:48:21', 'post_date_gmt' => '2024-08-13 15:34:01', 'post_content' => ' ', 'post_title' => '', 'post_excerpt' => '', 'post_status' => 'publish', 'comment_status' => 'closed', 'ping_status' => 'closed', 'post_password' => '', 'post_name' => '40508', 'to_ping' => '', 'pinged' => '', 'post_modified' => '2024-12-03 15:48:21', 'post_modified_gmt' => '2024-12-03 20:48:21', 'post_content_filtered' => '', 'post_parent' => 22, 'guid' => 'https://clay-king.local/?p=40508', 'menu_order' => 51, 'post_type' => 'nav_menu_item', 'post_mime_type' => '', 'comment_count' => '0', 'filter' => 'raw', 'db_id' => 40508, 'menu_item_parent' => '977', 'object_id' => '402', 'object' => 'product_cat', 'type' => 'taxonomy', 'type_label' => 'Category', 'url' => 'https://www.clay-king.com/product-category/bisqueware/bowls/', 'title' => 'Bowls', 'target' => '', 'attr_title' => '', 'description' => '', 'classes' => array ( 0 => '', ), 'xfn' => '', 'submenu_items' => array ( ), 'current_page' => false, )), 3 => \WP_Post::__set_state(array( 'ID' => 40509, 'post_author' => '3', 'post_date' => '2024-12-03 15:48:21', 'post_date_gmt' => '2024-08-13 15:34:01', 'post_content' => ' ', 'post_title' => '', 'post_excerpt' => '', 'post_status' => 'publish', 'comment_status' => 'closed', 'ping_status' => 'closed', 'post_password' => '', 'post_name' => '40509', 'to_ping' => '', 'pinged' => '', 'post_modified' => '2024-12-03 15:48:21', 'post_modified_gmt' => '2024-12-03 20:48:21', 'post_content_filtered' => '', 'post_parent' => 22, 'guid' => 'https://clay-king.local/?p=40509', 'menu_order' => 52, 'post_type' => 'nav_menu_item', 'post_mime_type' => '', 'comment_count' => '0', 'filter' => 'raw', 'db_id' => 40509, 'menu_item_parent' => '977', 'object_id' => '412', 'object' => 'product_cat', 'type' => 'taxonomy', 'type_label' => 'Category', 'url' => 'https://www.clay-king.com/product-category/bisqueware/dal-bisque-tiles/', 'title' => 'Dal Bisque Tiles', 'target' => '', 'attr_title' => '', 'description' => '', 'classes' => array ( 0 => '', ), 'xfn' => '', 'submenu_items' => array ( ), 'current_page' => false, )), 4 => \WP_Post::__set_state(array( 'ID' => 40510, 'post_author' => '3', 'post_date' => '2024-12-03 15:48:21', 'post_date_gmt' => '2024-08-13 15:34:01', 'post_content' => ' ', 'post_title' => '', 'post_excerpt' => '', 'post_status' => 'publish', 'comment_status' => 'closed', 'ping_status' => 'closed', 'post_password' => '', 'post_name' => '40510', 'to_ping' => '', 'pinged' => '', 'post_modified' => '2024-12-03 15:48:21', 'post_modified_gmt' => '2024-12-03 20:48:21', 'post_content_filtered' => '', 'post_parent' => 22, 'guid' => 'https://clay-king.local/?p=40510', 'menu_order' => 53, 'post_type' => 'nav_menu_item', 'post_mime_type' => '', 'comment_count' => '0', 'filter' => 'raw', 'db_id' => 40510, 'menu_item_parent' => '977', 'object_id' => '403', 'object' => 'product_cat', 'type' => 'taxonomy', 'type_label' => 'Category', 'url' => 'https://www.clay-king.com/product-category/bisqueware/drinkware/', 'title' => 'Drinkware', 'target' => '', 'attr_title' => '', 'description' => '', 'classes' => array ( 0 => '', ), 'xfn' => '', 'submenu_items' => array ( ), 'current_page' => false, )), 5 => \WP_Post::__set_state(array( 'ID' => 40511, 'post_author' => '3', 'post_date' => '2024-12-03 15:48:21', 'post_date_gmt' => '2024-08-13 15:34:01', 'post_content' => ' ', 'post_title' => '', 'post_excerpt' => '', 'post_status' => 'publish', 'comment_status' => 'closed', 'ping_status' => 'closed', 'post_password' => '', 'post_name' => '40511', 'to_ping' => '', 'pinged' => '', 'post_modified' => '2024-12-03 15:48:21', 'post_modified_gmt' => '2024-12-03 20:48:21', 'post_content_filtered' => '', 'post_parent' => 22, 'guid' => 'https://clay-king.local/?p=40511', 'menu_order' => 54, 'post_type' => 'nav_menu_item', 'post_mime_type' => '', 'comment_count' => '0', 'filter' => 'raw', 'db_id' => 40511, 'menu_item_parent' => '977', 'object_id' => '405', 'object' => 'product_cat', 'type' => 'taxonomy', 'type_label' => 'Category', 'url' => 'https://www.clay-king.com/product-category/bisqueware/holiday/', 'title' => 'Holiday', 'target' => '', 'attr_title' => '', 'description' => '', 'classes' => array ( 0 => '', ), 'xfn' => '', 'submenu_items' => array ( ), 'current_page' => false, )), 6 => \WP_Post::__set_state(array( 'ID' => 40512, 'post_author' => '3', 'post_date' => '2024-12-03 15:48:21', 'post_date_gmt' => '2024-08-13 15:34:01', 'post_content' => ' ', 'post_title' => '', 'post_excerpt' => '', 'post_status' => 'publish', 'comment_status' => 'closed', 'ping_status' => 'closed', 'post_password' => '', 'post_name' => '40512', 'to_ping' => '', 'pinged' => '', 'post_modified' => '2024-12-03 15:48:21', 'post_modified_gmt' => '2024-12-03 20:48:21', 'post_content_filtered' => '', 'post_parent' => 22, 'guid' => 'https://clay-king.local/?p=40512', 'menu_order' => 55, 'post_type' => 'nav_menu_item', 'post_mime_type' => '', 'comment_count' => '0', 'filter' => 'raw', 'db_id' => 40512, 'menu_item_parent' => '977', 'object_id' => '406', 'object' => 'product_cat', 'type' => 'taxonomy', 'type_label' => 'Category', 'url' => 'https://www.clay-king.com/product-category/bisqueware/jars-pitchers/', 'title' => 'Jars & Pitchers', 'target' => '', 'attr_title' => '', 'description' => '', 'classes' => array ( 0 => '', ), 'xfn' => '', 'submenu_items' => array ( ), 'current_page' => false, )), 7 => \WP_Post::__set_state(array( 'ID' => 40513, 'post_author' => '3', 'post_date' => '2024-12-03 15:48:21', 'post_date_gmt' => '2024-08-13 15:34:01', 'post_content' => ' ', 'post_title' => '', 'post_excerpt' => '', 'post_status' => 'publish', 'comment_status' => 'closed', 'ping_status' => 'closed', 'post_password' => '', 'post_name' => '40513', 'to_ping' => '', 'pinged' => '', 'post_modified' => '2024-12-03 15:48:21', 'post_modified_gmt' => '2024-12-03 20:48:21', 'post_content_filtered' => '', 'post_parent' => 22, 'guid' => 'https://clay-king.local/?p=40513', 'menu_order' => 56, 'post_type' => 'nav_menu_item', 'post_mime_type' => '', 'comment_count' => '0', 'filter' => 'raw', 'db_id' => 40513, 'menu_item_parent' => '977', 'object_id' => '409', 'object' => 'product_cat', 'type' => 'taxonomy', 'type_label' => 'Category', 'url' => 'https://www.clay-king.com/product-category/bisqueware/kitchen-bath/', 'title' => 'Kitchen & Bath', 'target' => '', 'attr_title' => '', 'description' => '', 'classes' => array ( 0 => '', ), 'xfn' => '', 'submenu_items' => array ( ), 'current_page' => false, )), 8 => \WP_Post::__set_state(array( 'ID' => 40514, 'post_author' => '3', 'post_date' => '2024-12-03 15:48:21', 'post_date_gmt' => '2024-08-13 15:34:01', 'post_content' => ' ', 'post_title' => '', 'post_excerpt' => '', 'post_status' => 'publish', 'comment_status' => 'closed', 'ping_status' => 'closed', 'post_password' => '', 'post_name' => '40514', 'to_ping' => '', 'pinged' => '', 'post_modified' => '2024-12-03 15:48:21', 'post_modified_gmt' => '2024-12-03 20:48:21', 'post_content_filtered' => '', 'post_parent' => 22, 'guid' => 'https://clay-king.local/?p=40514', 'menu_order' => 57, 'post_type' => 'nav_menu_item', 'post_mime_type' => '', 'comment_count' => '0', 'filter' => 'raw', 'db_id' => 40514, 'menu_item_parent' => '977', 'object_id' => '404', 'object' => 'product_cat', 'type' => 'taxonomy', 'type_label' => 'Category', 'url' => 'https://www.clay-king.com/product-category/bisqueware/miscellaneous/', 'title' => 'Miscellaneous', 'target' => '', 'attr_title' => '', 'description' => '', 'classes' => array ( 0 => '', ), 'xfn' => '', 'submenu_items' => array ( ), 'current_page' => false, )), 9 => \WP_Post::__set_state(array( 'ID' => 40515, 'post_author' => '3', 'post_date' => '2024-12-03 15:48:21', 'post_date_gmt' => '2024-08-13 15:34:01', 'post_content' => ' ', 'post_title' => '', 'post_excerpt' => '', 'post_status' => 'publish', 'comment_status' => 'closed', 'ping_status' => 'closed', 'post_password' => '', 'post_name' => '40515', 'to_ping' => '', 'pinged' => '', 'post_modified' => '2024-12-03 15:48:21', 'post_modified_gmt' => '2024-12-03 20:48:21', 'post_content_filtered' => '', 'post_parent' => 22, 'guid' => 'https://clay-king.local/?p=40515', 'menu_order' => 58, 'post_type' => 'nav_menu_item', 'post_mime_type' => '', 'comment_count' => '0', 'filter' => 'raw', 'db_id' => 40515, 'menu_item_parent' => '977', 'object_id' => '407', 'object' => 'product_cat', 'type' => 'taxonomy', 'type_label' => 'Category', 'url' => 'https://www.clay-king.com/product-category/bisqueware/plates-platters/', 'title' => 'Plates & Platters', 'target' => '', 'attr_title' => '', 'description' => '', 'classes' => array ( 0 => '', ), 'xfn' => '', 'submenu_items' => array ( ), 'current_page' => false, )), ), 'current_page' => false, )) Bisqueware
- \WP_Post::__set_state(array( 'ID' => 46203, 'post_author' => '3', 'post_date' => '2024-12-03 15:48:21', 'post_date_gmt' => '2024-11-27 01:44:37', 'post_content' => ' ', 'post_title' => '', 'post_excerpt' => '', 'post_status' => 'publish', 'comment_status' => 'closed', 'ping_status' => 'closed', 'post_password' => '', 'post_name' => '46203', 'to_ping' => '', 'pinged' => '', 'post_modified' => '2024-12-03 15:48:21', 'post_modified_gmt' => '2024-12-03 20:48:21', 'post_content_filtered' => '', 'post_parent' => 0, 'guid' => 'https://www.clay-king.com/?p=46203', 'menu_order' => 59, 'post_type' => 'nav_menu_item', 'post_mime_type' => '', 'comment_count' => '0', 'filter' => 'raw', 'db_id' => 46203, 'menu_item_parent' => '0', 'object_id' => '46202', 'object' => 'page', 'type' => 'post_type', 'type_label' => 'Page', 'url' => 'https://www.clay-king.com/?page_id=46202', 'title' => 'Wholesale Bisqueware', 'target' => '', 'attr_title' => '', 'description' => '', 'classes' => array ( 0 => '', ), 'xfn' => '', 'submenu_items' => array ( ), 'current_page' => false, )) Wholesale Bisqueware
- \WP_Post::__set_state(array( 'ID' => 40554, 'post_author' => '3', 'post_date' => '2024-12-03 15:48:21', 'post_date_gmt' => '2024-08-14 19:33:43', 'post_content' => ' ', 'post_title' => '', 'post_excerpt' => '', 'post_status' => 'publish', 'comment_status' => 'closed', 'ping_status' => 'closed', 'post_password' => '', 'post_name' => '40554', 'to_ping' => '', 'pinged' => '', 'post_modified' => '2024-12-03 15:48:21', 'post_modified_gmt' => '2024-12-03 20:48:21', 'post_content_filtered' => '', 'post_parent' => 0, 'guid' => 'https://clay-king.local/?p=40554', 'menu_order' => 60, 'post_type' => 'nav_menu_item', 'post_mime_type' => '', 'comment_count' => '0', 'filter' => 'raw', 'db_id' => 40554, 'menu_item_parent' => '0', 'object_id' => '34', 'object' => 'product_cat', 'type' => 'taxonomy', 'type_label' => 'Category', 'url' => 'https://www.clay-king.com/product-category/packages/', 'title' => 'Packages', 'target' => '', 'attr_title' => '', 'description' => '', 'classes' => array ( 0 => '', ), 'xfn' => '', 'submenu_items' => array ( ), 'current_page' => false, )) Packages
- \WP_Post::__set_state(array( 'ID' => 40555, 'post_author' => '3', 'post_date' => '2024-12-03 15:48:21', 'post_date_gmt' => '2024-08-14 19:33:43', 'post_content' => ' ', 'post_title' => '', 'post_excerpt' => '', 'post_status' => 'publish', 'comment_status' => 'closed', 'ping_status' => 'closed', 'post_password' => '', 'post_name' => '40555', 'to_ping' => '', 'pinged' => '', 'post_modified' => '2024-12-03 15:48:21', 'post_modified_gmt' => '2024-12-03 20:48:21', 'post_content_filtered' => '', 'post_parent' => 0, 'guid' => 'https://clay-king.local/?p=40555', 'menu_order' => 61, 'post_type' => 'nav_menu_item', 'post_mime_type' => '', 'comment_count' => '0', 'filter' => 'raw', 'db_id' => 40555, 'menu_item_parent' => '0', 'object_id' => '684', 'object' => 'product_cat', 'type' => 'taxonomy', 'type_label' => 'Category', 'url' => 'https://www.clay-king.com/product-category/gift-certificates/', 'title' => 'Gift Certificates', 'target' => '', 'attr_title' => '', 'description' => '', 'classes' => array ( 0 => '', ), 'xfn' => '', 'submenu_items' => array ( ), 'current_page' => false, )) Gift Certificates
- \WP_Post::__set_state(array( 'ID' => 45904, 'post_author' => '3', 'post_date' => '2024-12-03 15:48:21', 'post_date_gmt' => '2024-11-22 16:15:56', 'post_content' => ' ', 'post_title' => '', 'post_excerpt' => '', 'post_status' => 'publish', 'comment_status' => 'closed', 'ping_status' => 'closed', 'post_password' => '', 'post_name' => '45904', 'to_ping' => '', 'pinged' => '', 'post_modified' => '2024-12-03 15:48:21', 'post_modified_gmt' => '2024-12-03 20:48:21', 'post_content_filtered' => '', 'post_parent' => 0, 'guid' => 'https://www.clay-king.com/?p=45904', 'menu_order' => 62, 'post_type' => 'nav_menu_item', 'post_mime_type' => '', 'comment_count' => '0', 'filter' => 'raw', 'db_id' => 45904, 'menu_item_parent' => '0', 'object_id' => '478', 'object' => 'product_cat', 'type' => 'taxonomy', 'type_label' => 'Category', 'url' => 'https://www.clay-king.com/product-category/new-product-arrivals/', 'title' => 'New Product Arrivals', 'target' => '', 'attr_title' => '', 'description' => '', 'classes' => array ( 0 => '', ), 'xfn' => '', 'submenu_items' => array ( ), 'current_page' => false, )) New Product Arrivals
-
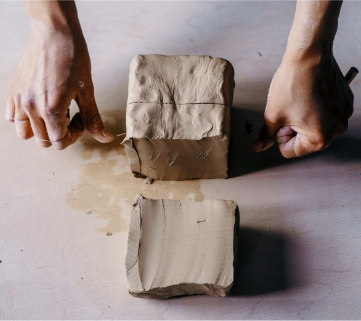
Clay (74)
-
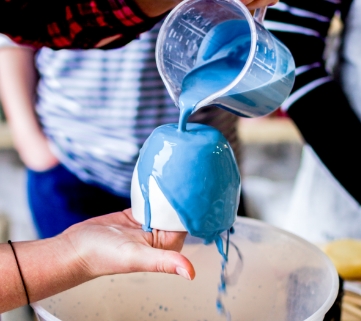
Glazes (2068)
-
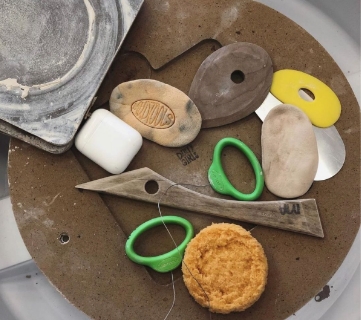
Pottery Tools (2806)
-
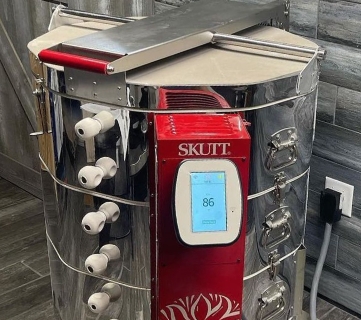
Kilns (253)
-
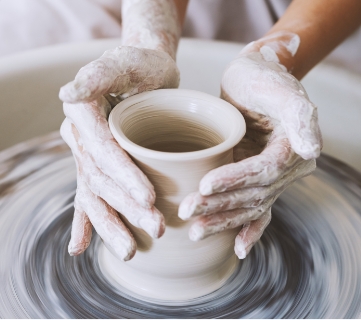
Pottery Wheels (22)
-

Other Equipment (191)
-
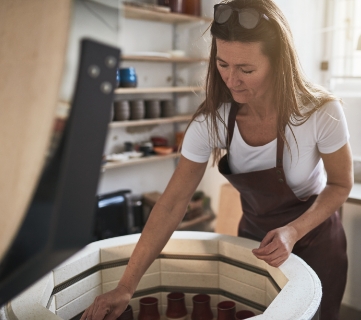
Accessories (1506)
-

Instructional (71)
-
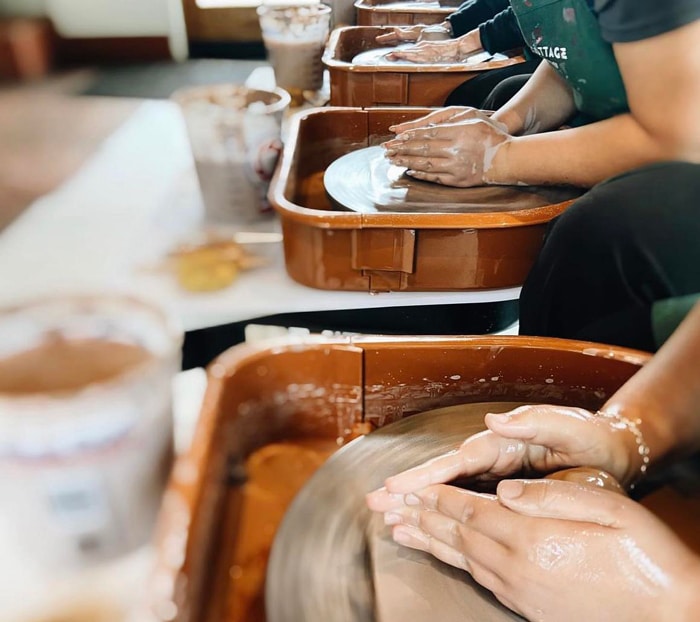
Classes (4)
-
Slip Casting (44)
-
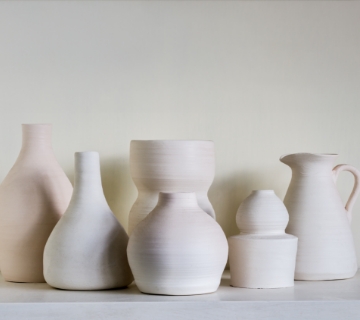
Bisqueware (210)
-
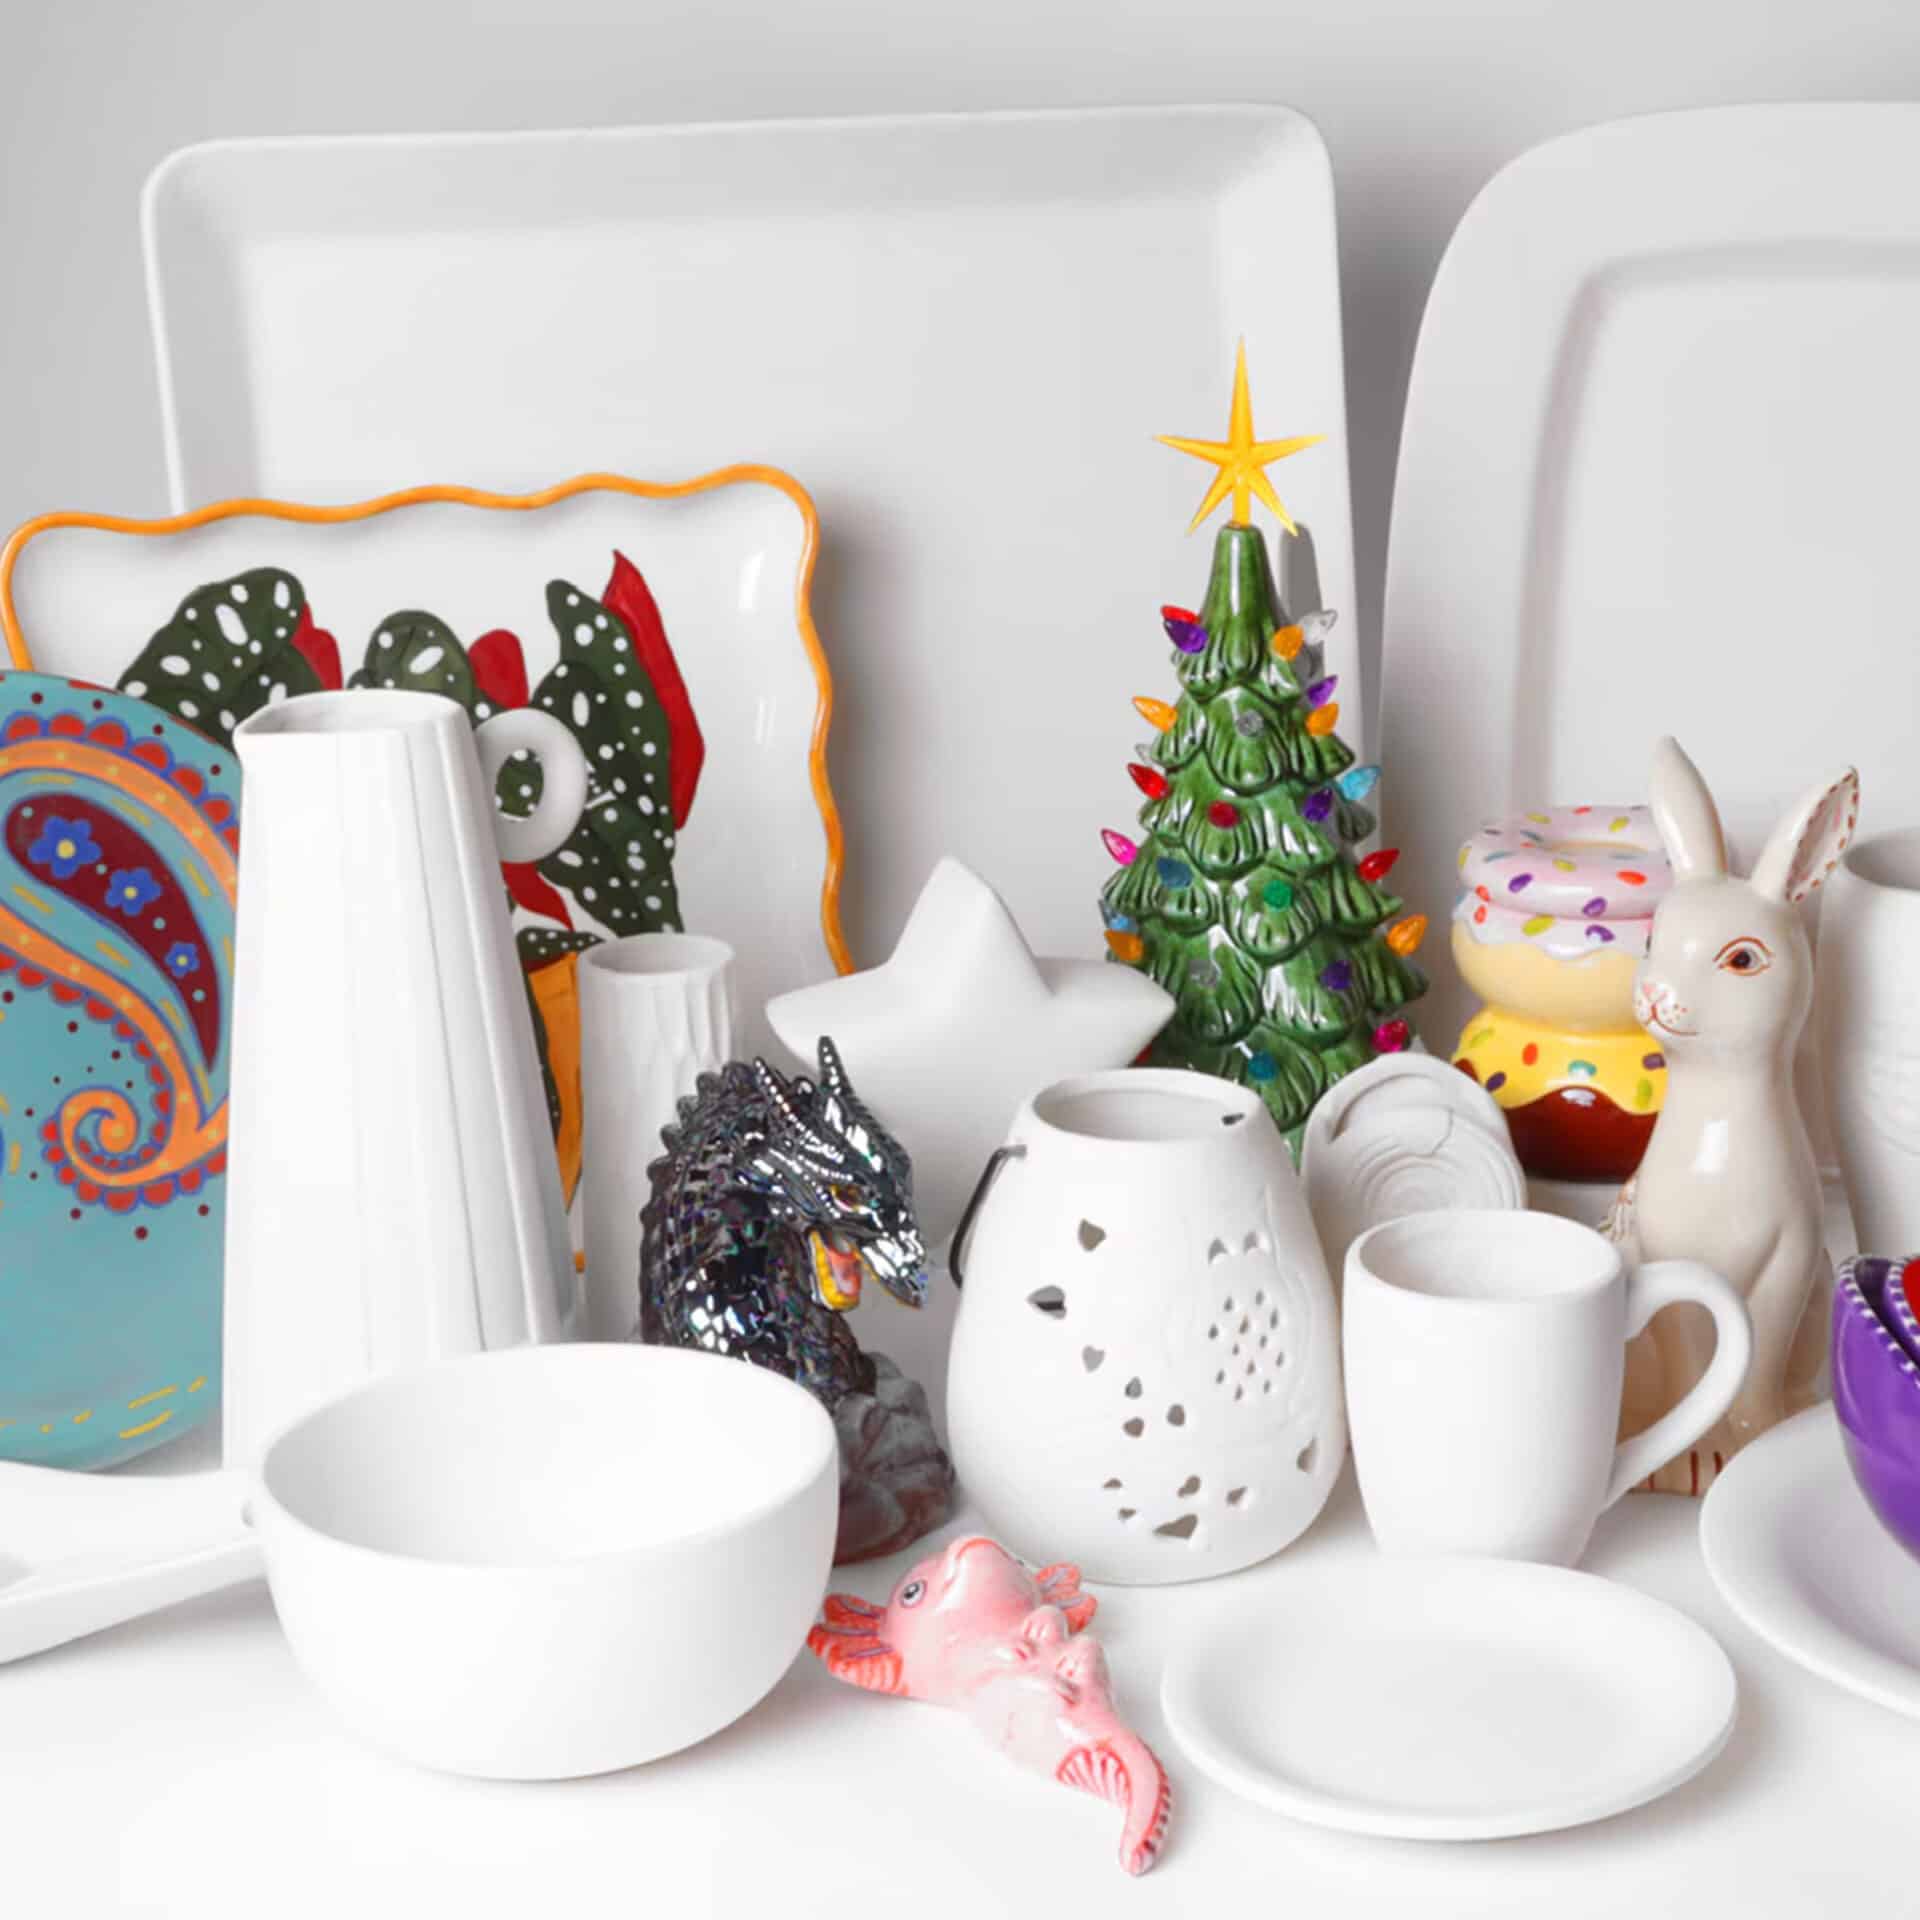
Wholesale Bisqueware (2354)
-
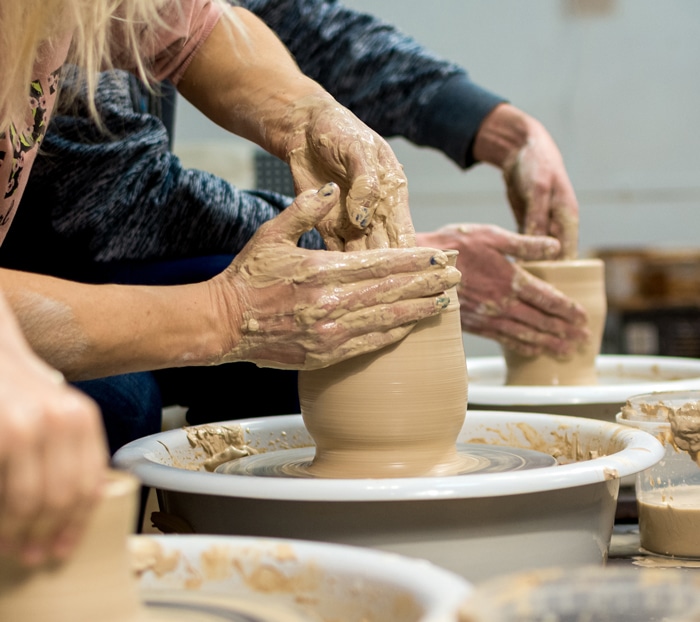
Packages (17)
-
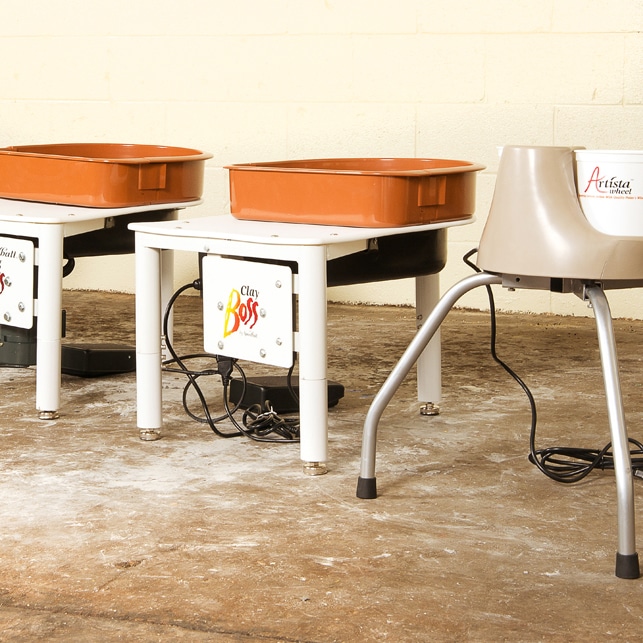
In Stock Equipment (50)
-

Clearance (79)
-
Pottery Specials (10)
-

Gift Certificates (1)
-

New Product Arrivals (149)
-

Uncategorized (20)
They call us the King of Clay for a reason! Check out our expansive selection of clay and ceramic pottery supplies. Whether you need bulk pottery products or a starter kiln to help launch your new hobby or business, Clay-King has it all.
You can expect lightning-fast shipping, stellar customer service, and products that are always in stock.
