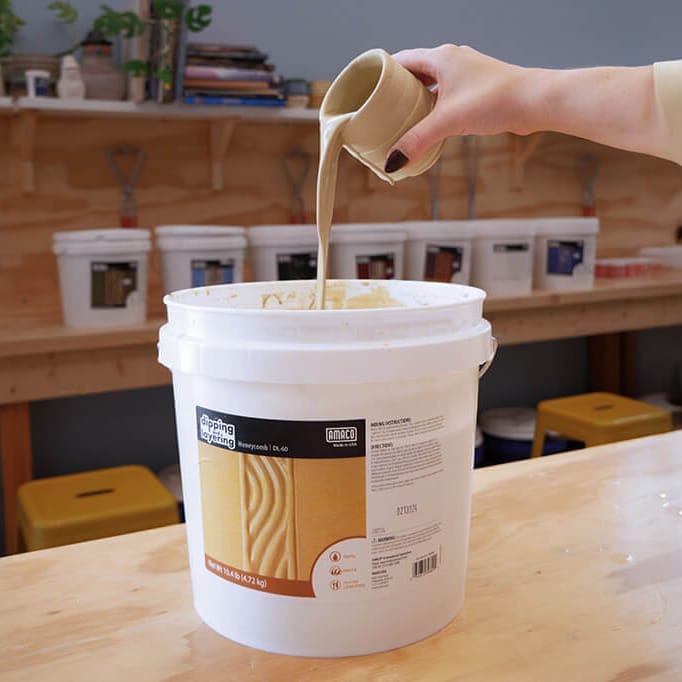
Search for


1-888-838-3625
Potters Wheels

Application Methods

The following list gives an overview on the general application of glazes. There are times when only two coats may be required, some times four coats, applied to bisque or greenware. Always read the jar label for the proper application instructions. There are times when a specific technique may require you to deviate from instructions on the jar. At those times, follow the technique carefully and apply those instructions only at that specified time.
  • Are generally applied to fired shelf cone 04 bisque. Always read the label for possible exceptions.
  • Wipe the piece down with a damp sponge before glazing.
  • Use either an Oval Mop or Flat Glaze brush to apply glazes and check individual glaze categories for any exceptions.
  • Shake jar and/or stir well before using. The consistency should be like melted ice cream.
  • Apply 3 flowing coats unless noted differently on the jar. Clear glazes require only 2 coats. Bright reds usually require 4 coats. Check individual glaze categories for exceptions.
  • Fire to shelf cone 06 unless noted differently on the jar label. Clean brushes with warm water and brush cleaner.

BRUSHING: Fired color is best applied with a natural hair brush. Use an oval mop, flat glaze or pointed round brush. There are synthetic hair brushes that can also be used to apply many of these same products. A wide selection of brushes is available and all have been designed for specific needs and products. Some brushes can be used in a variety of products. Always clean brushes well between uses.

For general application, we recommend that you use an oval mop to apply opaque underglazes and glazes. Oval mops come in several sizes. A second choice would be a flat glaze brush. A flat glaze brush is helpful when brushing glaze out of the embossed areas on a piece. A flat glaze brush is preferred when applying non-toxic glazes to highly detailed or embossed pieces. The size of the brush should be as large as possible for the area being covered. For smaller areas, a pointed round brush can be used.

Color should not be used directly out of the jar to avoid possible contamination of the remaining color. It should be placed onto a tile or in a shallow dish. Do not use wax-coated paper cups to hold color; the wax could prevent the color from properly adhering.

Moisten the brush with water and remove the excess. Dip the brush into the color up to the ferrule (metal part of the brush.) Tap the brush on the jar rim or tile to remove drips. The brush should not be dragged along the jar rim to remove color from the bristles. A full load of color should remain in the hairs of the brush.

Apply color in a flowing motion. Do not "scrub" color onto the ware. The brush should never drag because of a lack of color. Most likely a 3-coat application will be needed. Not all coats are equal. If bisque is visible underneath the first dried coat, then apply an extra coat for proper coverage. The thickness of the three coats combined should be about the same as the thickness of a postcard. Some colors require more or less than three coats of product. Always check the jar label for specific directions.

Apply each coat in a different direction. Crosshatch each successive coat applying at a 90° angle to the previous one. This will give more even coverage. Allow each coat to dry a few minutes until the shiny look is gone. 

ROLLING A GLAZE: Pouring or rolling a glaze to the inside surface of a container that is difficult to reach is a simple solution to glazing with a brush. Care should be taken when using this method of glazing because problems can occur. The inside of the piece must be free of any debris and clay dust. Any clay particles left inside may cause crawling. Excessive glaze in or on the bottom of the piece may cause it to split, pit or crawl. These problems can be overcome by making sure the excess glaze is removed by inverting the piece as the glaze dries. 

Glaze Butting: Refers to applying glazes side by side so that colors meet but do not blend. To butt glazes, avoid overlapping them. Use a pencil to draw a line on the bisque to determine the precise placement of the glazes. The mark will burn away during firing. When butting, the brush is used like a push broom at a 45° angle to shove the small ridge of glaze up to, but not over, the pencil line as the first coat is applied. This small roll of glaze should give sufficient coverage to the perimeter of the area so that special care with successive coats is not necessary; they can be applied in the usual manner. 

On a vertical piece, you can cut through the glaze while it is still wet and use a grease pencil (red marking pencil) to follow the original pencil mark. The grease in the pencil will provide enough of a barrier to keep the glazes in place. 

Be aware that some colors are sensitive to others. Some white or clear glazes placed next to glazes high in copper compounds may discolor. Metallic blacks and greens may cause a fuming, shadowing or flashing onto the lighter color. This is caused by a chemical reaction between the two glazes during firing. 

Glaze Combinations: Offers the hobbyist an expanded dimension to their decorating possibilities. There are "soft" glazes that move more during the firing process and these glazes have more tolerance against pitting, cracking or blistering. Using combinations of two types of glaze that react chemically to each other can give many exciting and unexpected results.

When two or more glazes that move or "boil" in the firing are used, one over another,  a blending of the two colors results. The glaze next to the bisque will always dominate the piece because it has a stronger footing or hold on the bisque. Except for the Series 2000 or other non-toxic glazes, the glossier the glaze is, the more it moves in the firing. Heavier applications of these glossier glazes will produce more dramatic intermingling of the colors.

Not all glazes used in combination need to be so free moving. Variations to the mix, for example, using a Series 2000 Matte glaze with a moving glaze, can give fascinating results. A non-moving glaze will retard the movement of a more active glaze. An application of 3 coats of a moving glaze applied first on the bisque, then 2 coats of a non-moving glaze on top of that will result in the breakup of the top glaze into little islands of the matte color.

Sponging: Different types of sponges can be used in decorating a piece. Each offers a distinct look. More than likely, a silk decorating sponge will be used for sponging most colors. It gives the best application for most glazes when an even coverage is needed. A sea wool type sponge produces a bumpy, mottled look or may be used to veil the color onto the ware. Once the type of sponge is selected and the color has been chosen, follow these application instructions:

  • Dampen the sponge and remove excess water onto a paper towel
  • Pour some of the color onto a tile
  • Pounce the sponge into the color and apply to the piece using the same pouncing (up & down) motion. Do not apply so much pressure to the sponge that the color runs out of the sponge and down the piece.
  • Allow the wet look to disappear before adding additional coats.
  • For solid coverage, more than three coats may be needed when using a sponge
  • As a general rule, 4-5 coats is required to achieve the same coverage as when you apply color using a brush.

Spattering: When spattering, a stiff bristled brush is loaded with color and then the handle of another brush is dragged over the bristles of the brush (toward the user), causing the color to spatter onto the ware in a speckled effect. Most any product can be applied this way. The specks of color can travel long distances, so cover or remove any other pieces from the decorating area.

Banding: Colored bands are created on round objects using a decorator's wheel. A decorator's wheel is a type of turntable that allows the ware to rotate evenly and freely while decorating. Some colors may require thinning to achieve proper color distribution or to create a specific effect.

  • Center the piece on the wheel
  • If possible, place something heavy inside the ware to weight the piece on the wheel, like a bag of beans or rice.
  • Load the brush with color
  • While the wheel is spinning, the brush is brought to the surface of the ware. The piece continues to rotate while the brush is on the ware.
  • Once color has been applied, the brush is lifted off the ware while the piece continues to rotate.
  • Many bands of color can be applied and blended back onto one another for a variety of effects.
Copyright 2006 clay-king.com 29307. toll free (888)-838-3625
Books/Videos
Bisqueware
Clay
Equipment
Glazes
Kilns
Wheels
Shelves
Tools